中文译文
模组
《战场兄弟》的多数 MOD 可以在 Nexus Mods 或 Mod DB 找到。
MOD制作
MOD 制作是通过修改文件来改变游戏内容与玩法的过程。
模组工具包
《战场兄弟》没有官方 MOD 工具。制作者通常使用 Adam Milazzo 的 MOD 工具包,解密并反编译游戏脚本。
访问文件
这是适用于 Windows 的分步教程。
- 用 7zip 等压缩工具,解压游戏的 data_001 资源包。
- 下载并解压工具包
- 打开命令提示符:在 Windows 搜索栏输入“运行”并回车,再输入 cmd。
- 输入 cd .../bbros/bin,切换到工具包的 bin 目录;其中 ... 是解压工具包的目录路径。若工具包位于其他盘符,请用 cd /d,而非仅用 cd。
- 输入 massdecompile.bat .../data_001/scripts,其中 ... 是解压 data_001 的目录路径。
反编译完成后,便可用文本编辑器打开、阅读和修改脚本。Notepad++ 可以把 data_001 文件夹加入工作区,方便浏览与跨文件搜索。
添加新资源
工具包附带 bbrusher,可把图片打包为精灵图集并创建 brush 资源。下面以 More Named Weapons MOD 为例,逐步介绍操作方法。
- 按照访问游戏文件一节的说明,进入工具包的 bin 文件夹。
- 也可先用以下命令解包游戏资源:
bbrusher unpack brush。其中 brush 是 brush 文件的完整路径,须包含目录与文件名,例如武器使用的 entity_icons.brush。对应图集,如 entity_icons.png,必须位于上级目录中的某处;建议沿用 data_001 的目录结构,避免路径问题。 - 制作资源

- 从头制作
- 取自游戏资源
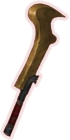
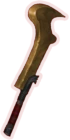
- 制作物品栏图标(朝向东北)
- 一张70 x 70(像素)的仓库图标
- 一张70 x 140(像素)的角色窗口大图标
- 制作战术(战斗)画面所用的图标
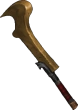
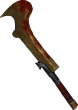
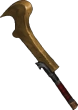
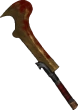
双手武器图标朝左上,单手武器图标朝右上。图片尺寸应接近原版同类武器;解包图集的方法见第 2 步。
- 普通版本
- 染血版本
- 为 brush 创建 metadata.xml 文件,示例如下。
- 添加 brush 标签,指定名称和版本 17;版本号可能随游戏更新而变化。
<brush name="gfx/entity_icons_abel.png" version="17">...</brush>
- 把精灵图插入 brush 标签内(替换“...”)
<sprite id="icon_named_crypt_cleaver_01" offsetY="35" ic="FF374554" width="130" height="142" img="icons/icon_named_crypt_cleaver_01.png" left="-65" right="13" top="-56" bottom="54" />
<sprite id="icon_named_crypt_cleaver_01_bloodied" offsetY="35" ic="FF29344E" width="130" height="142" img="icons/icon_named_crypt_cleaver_01_bloodied.png" left="-65" right="13" top="-56" bottom="54" />
- id 是用于引用该图标的唯一标识。
- ic 的具体用途尚不明确,可能与颜色有关;可以参考同类武器的 ic 值。
- img 是图标相对于 metadata.xml 所在文件夹的路径。
- offsetY 是 Y 轴,即垂直方向的偏移量;修改它会改变图像的显示高度。
- left、right、top、bottom 表示相对位置,可参考同类武器。左右与上下边界的差值必须分别等于图片的像素宽、高,否则 bbrusher 会报错。
- 添加 brush 标签,指定名称和版本 17;版本号可能随游戏更新而变化。
- 用以下命令创建 brush:
bbrusher pack brush directory。其中 brush 是目标 brush 文件名,例如 entity_icons_abel.brush;directory 是 metadata.xml 所在文件夹的路径。 - 将生成的精灵图集添加到 preload/on_running.txt。
gfx/entity_icons_abel.png - 如有需要,为新资源创建文件,以类似资源的文件为模板,填入新参数。
- 文件对象名
this.named_crypt_cleaver - ID(标识)
"weapon.named_crypt_cleaver" - Name(名称)
"Named Crypt Cleaver" - IconLarge(大图标文件的完整路径)
"weapons/melee/named_crypt_cleaver_01_70x140.png" - Icon(图标文件的完整路径)
"weapons/melee/named_crypt_cleaver_01_70x70.png" - ArmamentIcon(未染血版本的标识)
"icon_named_crypt_cleaver_01" - 必要时还需填写其他变量
- 文件对象名
- 必要时将资源分配给实体
例如,在 scripts/entity/tactical/enemies/skeleton_heavy.nut 的
assignRandomEquipment()函数中插入this.m.Items.equip(this.new("scripts/items/weapons/named/named_crypt_cleaver"));这一行,古代军团兵就会显示新武器。 - 将所有文件放入正确位置,即《战场兄弟》的 data 文件夹内,并保持对应目录结构。
也可以把所有文件和文件夹统一打包进压缩包。
- “brushes”文件夹中的画刷定义
- “gfx”文件夹中的精灵图集
- 近战武器的物品栏图标放在 gfx/ui/items/weapons/melee 文件夹。
- 名贵武器脚本放在 scripts/items/weapons/named 文件夹。
- 敌人脚本放在 scripts/entity/tactical/enemies 文件夹。
- 其他文件同理,遵循原版目录结构与文件位置。

教程
- LordMidas 的《战场兄弟》MOD 制作教程(持续编写中)
- TaroEld 的游戏文件简便解包教程
- TaroEld 的 Mod Hooks 教程
- Vilain Joueur 的调试模式工具(文档链接)
存档编辑工具
其他工具
翻译/本地化
英文原文
Mods
Most mods for Battle Brothers can be found at Nexus Mods or Mod DB.
Modding
Modding is the process of modifying files to change the gameplay.
The mod kit
Battle Brothers doesn't have official modding tools. Rather, modders use Adam Milazzo's mod kit to decrypt and decompile the game scripts.
Accessing the files
This is a step-by-step tutorial for Windows.
- Extract the contents of the game 'data_001' archive with a file archiver like 7zip
- Download and extract the kit
- Open a command prompt (type 'run' in the Windows search bar and enter), then type 'cmd'
- Go to the kit bin directory by typing 'cd .../bbros/bin', where '...' is a path to the directory where you extracted the kit (use 'cd /d' instead of just 'cd' if the kit is located on another drive than the current one)
- Type in 'massdecompile.bat .../data_001/scripts' where '...' is a path to the directory where you extracted 'data_001'
The scripts are now decompiled and can be opened, read and edited with a text editor. Notepad++ can add the 'data_001' folder as a workspace which comes handy for navigation and folder wide searches.
Adding new asset
The mod kit includes bbrusher, a program that can pack images into sprite sheets and create brushes. This is a step-by-step tutorial using the More Named Weapons mod as an example.
- Access the bin folder of the mod kit following the guidelines of the Accessing the files section
- Optionally, unpack the game assets with this command:
bbrusher unpack brush, where 'brush' is the full path (including the directory) to a brush ending with the brush name, for example: entity_icons.brush (weapons). The brush sprite sheet (for example, entity_icons.png) must be present somewhere in the parent folder (preferably use the data_001 structure to avoid any issues). - Create the assets
- from scratch
- from the game assets
- Create inventory icons (north east orientation)
- A 70 x 70 (pixels) stash icon
- A large 70 x 140 (pixels) character window icon
- Create icons for the tactical (combat) screen
Orientation is north west for two-handed weapons, north east for one-handed weapons. Image size should stay close to the size of similar base game weapons (see 2. to unpack sprites).
- A normal version
- A bloodied version
- Create a metadata.xml file for the brush (example)
- Add brush tags, specifying a name and version 17 (this number could change with updates)
<brush name="gfx/entity_icons_abel.png" version="17">...</brush>
- Insert sprites inside the brush tags (replace the '...')
<sprite id="icon_named_crypt_cleaver_01" offsetY="35" ic="FF374554" width="130" height="142" img="icons/icon_named_crypt_cleaver_01.png" left="-65" right="13" top="-56" bottom="54" />
<sprite id="icon_named_crypt_cleaver_01_bloodied" offsetY="35" ic="FF29344E" width="130" height="142" img="icons/icon_named_crypt_cleaver_01_bloodied.png" left="-65" right="13" top="-56" bottom="54" />
- 'id' is the unique identifier used to refer to the icon
- 'ic' has no know application; it could refer to a color; use a similar weapon ic
- 'img' is the icon path inside the folder where metadata.xml is located
- 'offsetY' is an offset on the Y (vertical) axis; modifying it will change the asset elevation
- 'left', 'right', 'top', 'bottom' are relative positions; use a similar weapon position; the intervals must equal the image size (in pixels) otherwise bbrusher will return an error
- Add brush tags, specifying a name and version 17 (this number could change with updates)
- Create the brush with this command:
bbrusher pack brush directory, where 'brush' is the name of a brush, for example: entity_icons_abel.brush and 'directory' the folder path to where metadata.xml is stored - Add the generated sprite sheet to 'preload/on_running.txt'
gfx/entity_icons_abel.png - Create a new file for the asset if required, using a similar file as a template and input the new values
- file object name
this.named_crypt_cleaver - ID
"weapon.named_crypt_cleaver" - Name
"Named Crypt Cleaver" - IconLarge (full path to file)
"weapons/melee/named_crypt_cleaver_01_70x140.png" - Icon (full path to file)
"weapons/melee/named_crypt_cleaver_01_70x70.png" - ArmamentIcon (unbloodied version id)
"icon_named_crypt_cleaver_01" - and other variables if necessary
- file object name
- Assign the asset to an entity if necessary
For example, modify the
assignRandomEquipment()function inside 'scripts/entity/tactical/enemies/skeleton_heavy.nut' by inserting this line:this.m.Items.equip(this.new("scripts/items/weapons/named/named_crypt_cleaver"));so that Ancient Legionaries will show with the new weapon. - Move everything in its correct location (inside the Battle Brothers data folder)
Optionally, an archive can regroup all files and folders.
- Brushes in the 'brushes' folder
- Sprite sheets in the 'gfx' folder
- Melee weapon inventory icons in the 'gfx/ui/items/weapons/melee' folder
- Named weapon files in the 'scripts/items/weapons/named' folder
- Enemy files in the 'scripts/entity/tactical/enemies' folder
- And so on for other files, respecting the base folder structure and file location
Tutorials
- Battle Brothers Modding Tutorial by LordMidas (work in progress)
- How to unpack the game files the easy and neat way by TaroEld
- Mod hooks tutorial by TaroEld
- Debug Mode Tool by Vilain Joueur (Documentation Link)