WORK IN PROGRESS (see the associated discussion on Steam)
Updated for the 'Warriors of the North' DLC.
Economy
Economy relates to the management of resources. In Battle Brothers, resources include  (the game currency),
  ,
,  ,
,  and
and  . Mercenaries and equipment could also count as resources. But given their complexity, they will be studied on their own.
At the start of a new campaign, players can set the economic difficulty and starting funds. The effects of each setting is displayed in the tables below:
|
|
|
|
|
| |
|---|---|---|---|---|---|
| High | 2500 | 50 | 40 | 80 | 30 |
| Medium | 2000 | 50 | 20 | 40 | 20 |
| Low | 1500 | 50 | 10 | 20 | 10 |
|
|
|
|
|
| |
|---|---|---|---|---|---|
| Beginner 入门 | - | - | 200 | 500 | 150 |
| Veteran 老练 | - | - | 150 | 300 | 100 |
| Expert 专家 | - | - | 150 | 300 | 100 |
| Contract rewards | Selling prices | Deserters | |
|---|---|---|---|
| Beginner 入门 | 100% | 100% | |
| Veteran 老练 | 100% | 100% | |
| Expert 专家 | 90% | 90% | Leave with their equipment |
How do I make money?
A recurring problem, especially in the early game. Sources of income are quite obvious but effectively tapping into them can prove challenging:
- Contracts
- Trade
- Looting
- Raiding正在劫掠
- Events
To keep hard-earned money it's also important to manage expenses:
- Wages
- Purchases
Contracts
A main source of income throughout the whole game.
How much do they pay?
Contract payment scales with:
- Type
- Random modifier
- Difficulty rating (skulls)
- Renown
- Economic difficulty (see Economy)
- Negotiations谈判
The type variable is set for each contract according to its inherent difficulty. For example, the 'return item' contract has a value of 400 and the 'find artifact' contract has the highest value of 2,000.
The random modifier is a multiplier between 90% and 110%.
The difficulty rating gives a random multiplier inside a range. It is then raised to the power of 1.3:
 = 63% - 81%
 = 94% - 107%
 = 120% - 148%
Renown × 0.3% is used as a base raised to the power of 0.39. The result is another multiplier that cannot be lower than 1.35 (720 Renown) nor higher than 2.7 (4,256 Renown). The gains are very high with low Renown values and slowly become almost linear as it grows. There's another formula with smaller benefits but it's only used for a couple contracts ('deliver item' and 'discover location').
Renown has the biggest impact of all modifiers on contract payments so increasing it as quickly as possible should be a priority. Contrary to a popular belief, Renown has no effect on enemy strength but it can be used as a condition for some events. Here's a summary of what affects Renown:
| Battle Won | Camp Destroyed | Contract Completed | Ambition Completed |
|---|---|---|---|
| 5 | 10 | 25 | 100 |
| Daily Loss | Retreat 撤退 | Contract Poorly Handled | Contract Failed | Contract Canceled | Employer Betrayed |
|---|---|---|---|---|---|
| −2 | −15 | −25 | −75 | −100 | −200 |
Economic difficulty gives yet another multiplier. One contract ('big game hunt') gets an additional multiplier based on the difficulty rating. All delivery contracts also take distance traveled into account.
Should I negotiate for better payment?
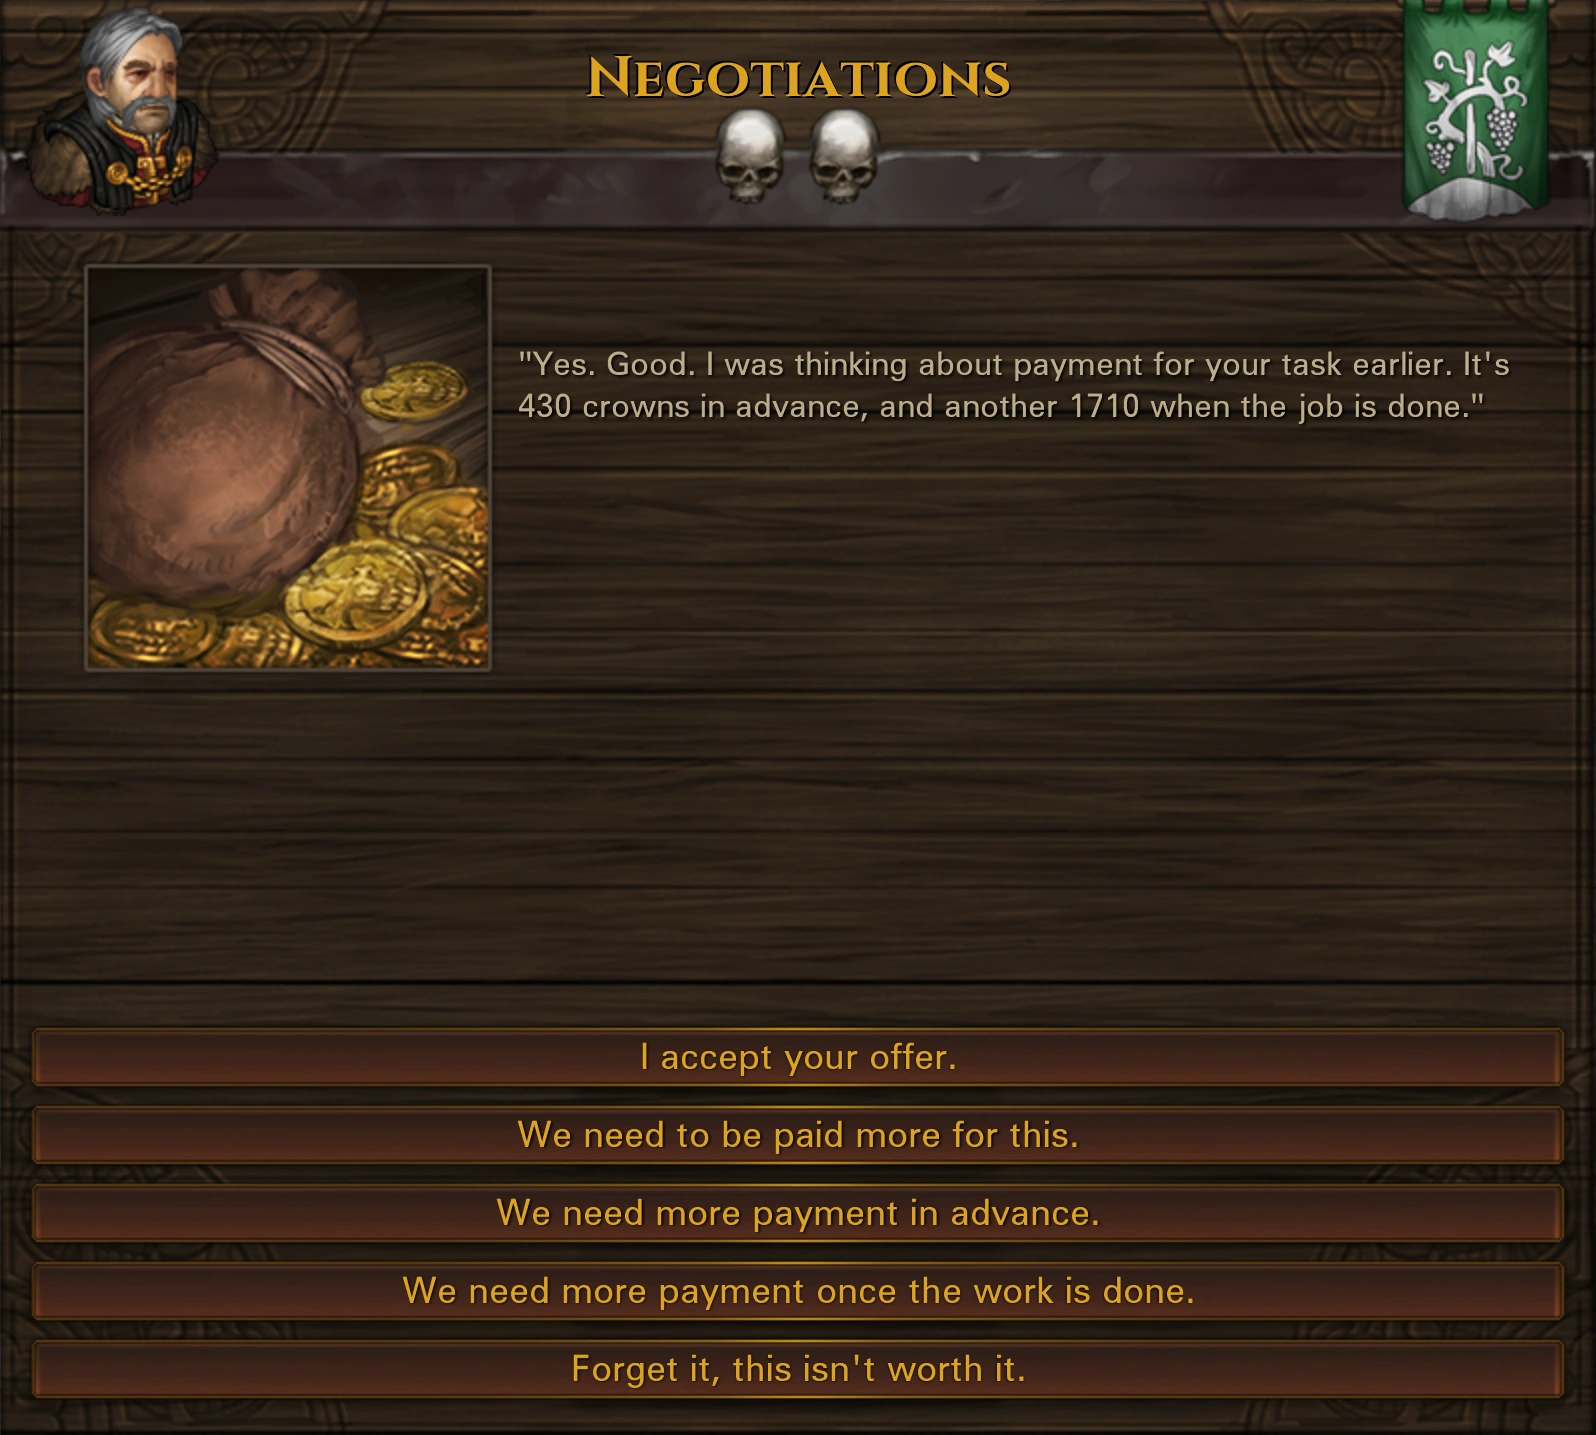 <a class="w-mw-file-description w-image" href="https://static.wikia.nocookie.net/battlebrothers/images/c/c1/Negotiations_01.png/revision/latest?cb=20180830112023"><img alt="Negotiations screen" class="w-thumbimage" data-image-key="Negotiations_01.png" data-image-name="Negotiations 01.png" data-relevant="1" data-src="https://static.wikia.nocookie.net/battlebrothers/images/c/c1/Negotiations_01.png/revision/latest/scale-to-width-down/270?cb=20180830112023" decoding="async" height="243" loading="lazy" src="/wiki/media/0f89e0fb026c3e8469f7885fcd1a2352d5e2cd006015ee5284f0033cfe8b4ce9.webp" title="Negotiations 01.png" width="270"/></a>
 Negotiations screen
The short answer is: yes, but well and not too much.
Negotiations谈判 offer up to four options (besides accepting an offer or refusing a contract altogether):
- We need to be paid more for this (no special mode of payment)
- We need (more) payment in advance
- We need more payment once the work is done (only available if payment in advance is currently offered and cannot be selected two times in a row)
- We need to be paid (more) per head we return with (only available for contracts involving kills)
Out of these four options, only the first one gives a net gain on payment (for a slight relations关系 penalty of −0.5%). The other options just reallocate an initial sum. It is understandable in the case of an advance because after all, time is money. But the last two modes of payment are basically scams. Better avoid them! For the same reason, it's counterproductive to jump back and forth between modes (and unlikely to work at all) so stick to one.
When attempting to negotiate, the game first checks if the attempt is successful using an 'annoyance' variable. A random number between 3 and 6 is rolled and compared to a maximum tolerance valued at 9. If superior, the negotiations fail, resulting in a relations penalty (−2.5%) with the faction and removing the contract. So it's always safe to negotiate at least once, risky to do it twice (62.5% chance of success without knowing the previous roll), almost impossible to do it thrice and impossible to do it more. Asking for a payment in advance three times in a row (two if it's offered at the start) will always fail.
Even if the negotiation attempt does not fail, there's a chance the employer will refuse new terms. The base chance is 10% × annoyance (the sum of the random rolls).
These are the effects in case of a success:
| More | Advance | Completion | Heads |
|---|---|---|---|
| +3% to +10% of payment | +25% in advance & −25% on completion | +25% on completion & −25% in advance | various reallocation between completion and advance |
What influences contract difficulty?
Contract difficulty scales with:
- Type
- Difficulty rating (skulls)
- Roster strength
- Combat difficulty
Each type of contract has a base value that ranges from 40 to 200. It's multiplied by the other variables.
The difficulty rating gives a random multiplier inside a range.
- = 70% - 85%
- = 95% - 105%
- = 105% - 135%
The roster strength rates the power of the 12 or 14 (Peasant Militia农民民兵 origin) strongest characters in your party. Each character is valued at 10 + (level - 1) × 2. If the party contains less than 3 members, each character whatever his level adds +10 to the strength rating.
The following formula is used to calculate the final multiplier: 94% × (1% × roster strength) ^ 0.89. It cannot be lower than 0.75 (78 strength or about 8 level 1 characters) or higher than 5 (654 strength or about 12 level 21 characters). The result is then multiplied by the combat difficulty:
- Beginner = 85%
- Veteran = 100%
- Expert = 115%
The roster strength is potentially the most impactful variable. That's why some people recommend keeping a low number of men to reduce the difficulty of contracts. Each additional level 1 character before 12 or 14 (Peasant Militia origin) is worth 6 levels in strength.
The maximum number and type of enemies is limited by the spawn list used (the difficulty doesn't scale indefinitely).
Trade
Trade consists in buying goods to sell them at a profit. Trade potential is directly linked to a map layout (settlements and attached locations, terrain and roads) which makes it an unreliable source of income. The Trading Caravan贸易商队 origin improves trade profitability by giving better prices. Trade itself is (finances put aside) risk-free and as such quite useful in the early game when recruits, equipment and other sources of income are still weak.
How can I increase trade profitability?
Trade goods sell for their full worth (instead of 95% for Treasures and 15% for other items). But they are still subjected to prices variations. Obviously, bigger profits come from buying cheap, discounted goods and selling them at a premium rate. For each settlement, prices are affected by:
- Settlement type
- Number of attached locations
- Relations关系
- Situations
- Type of attached locations (trade goods locally produced or not)
- Origin
- Economic difficulty (see Economy)
The base price multiplier is defined by the settlement level:
- Level 1 (small): 95%
- Level 2 (medium): 102%
- Level 3 (large): 110%
To that value is added the number of attached locations × 3%. This number ranges from 3 to 8 (9-24%). It is therefore best to buy in small villages with few attached locations and sell in large developed cities.
Another number based on relations with the settlement (0-100) is added or subtracted to the base multiplier:
- Relations < 50: ± (50 − relations) × 0.6% for a range of 0-30% (added if buying, subtracted if selling)
- Relations > 50: ± (relations − 50) × 0.3% for a range of 0-15% (subtracted if buying, added if selling)
Negative relations are doubly as penalized as positive relations are rewarded. Seemingly, civilian relations is what counts for towns, noble relations for fortifications.
Settlement types and their locations as well as your relations with them have the biggest impact on prices. So it's a good idea to leverage these variables as much as possible to maximize profits. Situations can also greatly affect prices. Some multiply all prices while others just target a specific price or item type prices (see their page for details).
Trade goods prices differ depending on whether or not they are produced in the settlement:
- Locally produced
- Buying price: unchanged
- Selling price: 15%
- Not locally produced
- Buying price: 150%
- Selling price: 110%
This reflects the supply and demand economic model. If the location is destroyed, the goods are considered not produced anymore.
Origins can also affect prices:
- Beast Slayers猎兽者
- Buying price: 110%
- Selling price: 90%
- Trading Caravan贸易商队
- Buying price: 90%
- Selling price: 110%
Overall, Beast Slayers will make 20% less money with trade while the Trading Caravan will make 20% more.
The economic difficulty only modifies selling prices (90% for expert).
When do stocks replenish?
Shops resupply every 3 days but situations can force a restock.
How to effectively trade?
Player Drathnar has an interesting view on trade:
- I generally don't really find it that profitable to do trading just for trading's sake, unless your map has lots of places producing trade goods.Yes, you'll make some gold, but you also need to deduct daily wage and food expenses for the men for the time you need to travel to a proper city hall to sell those goods. Also very occasionally there are unfavorable settlement situations at your destination and no ready contract to clear them, which can really put a dent in one's plans for trade.
So usually what I do is I plan my next destination according to contracts I can pick up. But I do buy any trade goods in town which are cheap. Hopefully at some point, when I visit a City Hall settlement, I'll dump all my items and goods there.[1]
He follows up on the importance of managing inventory space to maximize earnings and avoid opportunity costs:
- As you progress through the game, foes will drop better gear and the benefit of trade goods needs to be compared whether it is worth occupying that slot. For example, you might buy Peat Bricks at 111G and sell for 131G at a City Hall, but if you're killing enough brigands and getting good loot, having that slot for say an extra Hatchet that you would have otherwise discarded would net you 37G extra gold. And Hatchets are of course just tier 1 weapons. If missing out on tier 2 weapons, the opportunity cost would be much larger.[1]
Looting
Looting is the process of attacking parties or locations for spoils. Treasures can be used or sold:
- Equipment
- Resources
- Valuable items
All items but trade goods (see the Trade section) sell for a fraction of their worth:
- Treasure: 95%
- Other items: 15%
In effect, for a same base value, 1 treasure is worth roughly 6 items. To the exception of the Lindwurm's Hoard which slain Lindwurms林德蠕龙 sometimes reward, treasure can only be found in locations. Tavern rumors can mention a location containing treasure.
Should I repair damaged equipment before selling it?
Selling Treasures can be more or less rewarding depending on its type and worth, the settlement where it is sold (see How can I increase trade profitability?). But the selling price of an item also depends, if it has any, on its durability. It means that weapons, shields, armor护甲 and helmets will sell for more if they're undamaged. To repair an item hold ALT and right click it.
Each unit repairs 15 durability. Assuming a same price, there are thus two parameters to account for in the calculation:
- Worth
- Maximum durability
The following table shows a list of equipment. The 'W/D' row represents worth per unit of durability. The 'W/20T@17%' row represents the return on a 20 stack investment for repairing and selling the item at 17% of its worth (default average selling price modifier in large settlements for expert economic difficulty). Values that are higher than what a 20 stack costs are a profit.
Items with a very low return, that is a W/D of less than 5 were removed from the table.
| Name | Worth | W/D | W/20T@17% |
|---|---|---|---|
| Heavy Crossbow重弩 | 3200 | 50 | 2550 |
| Noble Sword贵族长剑 | 3200 | 44.4 | 2267 |
| Shamshir舍施尔弯刀 | 2900 | 40.3 | 2054 |
| Fighting Axe战斧 | 3000 | 37.5 | 1913 |
| Fighting Spear战矛 | 2500 | 34.7 | 1771 |
| Bardiche长刃斧 | 2200 | 34.4 | 1753 |
| Crypt Cleaver墓穴斩刀 | 1600 | 33.3 | 1700 |
| Fencing Sword决斗刺剑 | 1550 | 32.3 | 1647 |
| Masterwork Bow名匠之弓 | 3500 | 31.8 | 1623 |
| Khopesh镰形剑 | 1300 | 31 | 1579 |
| Rhomphaia镰刃长剑 | 1300 | 31 | 1579 |
| Rusty Warblade锈蚀战刃 | 1600 | 30.8 | 1569 |
| Greatsword巨剑 | 2200 | 30.6 | 1558 |
| Greataxe巨斧 | 2400 | 30 | 1530 |
| War Bow战弓 | 2900 | 29 | 1479 |
| Warbrand长刃战刀 | 1800 | 28.1 | 1434 |
| Spiked Impaler刺桩重弩 | 2000 | 27.8 | 1417 |
| Longsword长剑 | 1600 | 26.7 | 1360 |
| Three-Headed Flail三头连枷 | 1600 | 26.7 | 1360 |
| Winged Mace翼刃钉锤 | 2100 | 26.3 | 1339 |
| Man Splitter劈人巨斧 | 1600 | 25 | 1275 |
| Warhammer破甲锤 | 2500 | 25 | 1275 |
| Military Cleaver军用斩刀 | 1900 | 23.8 | 1211 |
| Battle Standard战旗 | 1500 | 23.4 | 1195 |
| Head Chopper断头斩刀 | 1200 | 23.1 | 1177 |
| Arming Sword骑士单手剑 | 1250 | 22.3 | 1138 |
| Coat of Plates铁片战衣 | 7000 | 21.9 | 1116 |
| Heavy Rusty Axe锈蚀重斧 | 2000 | 20.8 | 1063 |
| Berserk Chain狂战锁链 | 1300 | 20.3 | 1036 |
| Ancient Sword古代长剑 | 850 | 20.2 | 1032 |
| Coat of Scales重鳞甲衣 | 6000 | 20 | 1020 |
| Gnarly Staff盘根木杖 | 500 | 20 | 1020 |
| Bladed Pike | 600 | 20 | 1020 |
| Jagged Pike锯齿长枪 | 800 | 20 | 1020 |
| Warscythe战镰 | 700 | 19.4 | 992 |
| Billhook钩镰 | 1400 | 19.4 | 992 |
| Flail | 1400 | 19.4 | 992 |
| Head Splitter裂颅斧 | 1200 | 18.8 | 956 |
| Heavy Lamellar Armor重型札甲 | 5000 | 17.5 | 895 |
| Sellsword's Armor佣兵甲 | 4500 | 17.3 | 883 |
| Cruel Falchion凶刃弯刀 | 900 | 17.3 | 883 |
| Scale Armor鳞甲 | 4000 | 16.7 | 850 |
| Long Axe | 1200 | 16.7 | 850 |
| Two-Handed Hammer双手战锤 | 2000 | 16.7 | 850 |
| Heraldic Hauberk纹章长身锁甲 | 4000 | 16 | 816 |
| Noble Mail贵族锁甲 | 2500 | 15.6 | 797 |
| Crossbow弩 | 750 | 15.6 | 797 |
| Decayed Coat of Plates朽坏板甲衣 | 4000 | 15.4 | 785 |
| Ancient Plated Scale Hauberk古代加板鳞甲 | 3200 | 15.2 | 777 |
| Two-Handed Flail双手连枷 | 1200 | 15 | 765 |
| Scimitar弯刀 | 700 | 14.6 | 744 |
| Pike长枪 | 900 | 14.1 | 717 |
| Ancient Plate Harness古代板甲 | 2800 | 14 | 714 |
| Barbute Helmet巴布特盔 | 2600 | 13.7 | 698 |
| Broken Pike | 350 | 13.5 | 687 |
| Decorated Full Helm华饰全覆盔 | 4000 | 13.3 | 680 |
| Two-Handed Flanged Mace双手棱头钉锤 | 1600 | 13.3 | 680 |
| Hand Axe | 900 | 13.2 | 675 |
| Lamellar Harness札甲 | 3000 | 13 | 665 |
| Hooked Blade钩刃 | 700 | 12.7 | 649 |
| Ancient Scale Coat古代鳞甲衣 | 2400 | 12.6 | 644 |
| Decayed Coat of Scales朽坏重鳞甲衣 | 3000 | 12.5 | 638 |
| Scramasax萨克斯长刀 | 700 | 12.5 | 638 |
| Spetum三尖矛 | 750 | 12.5 | 638 |
| Two-Handed Spiked Mace双手尖刺钉锤 | 900 | 12.5 | 638 |
| Two-Handed Mace双手钉锤 | 1000 | 12.5 | 638 |
| Boar Spear猎猪矛 | 750 | 11.7 | 598 |
| Full Helm全罩盔 | 3500 | 11.7 | 595 |
| Battle Whip战鞭 | 450 | 11.3 | 574 |
| Military Pick军用战镐 | 900 | 11.3 | 574 |
| Ancient Plated Mail Hauberk古代板式长身锁甲 | 2000 | 11.1 | 567 |
| Two-Handed Skull Hammer双手颅骨锤 | 1300 | 10.8 | 553 |
| Closed Flat Top with Mail锁甲封闭式平顶盔 | 3000 | 10.7 | 546 |
| Conic Helmet with Faceguard面甲锥形盔 | 3000 | 10.7 | 546 |
| Falchion阔刃刀 | 500 | 10.4 | 531 |
| Sallet Helmet萨莱特盔 | 1200 | 10 | 510 |
| Thorned Whip棘刺鞭 | 400 | 10 | 510 |
| Two-Handed Mallet双手木槌 | 500 | 10 | 510 |
| Conic Helmet with Closed Mail覆面锁甲锥形盔 | 2600 | 9.8 | 500 |
| Flat Top with Closed Mail覆面锁甲平顶盔 | 2600 | 9.8 | 500 |
| Nordic Helmet with Closed Mail覆面锁甲北境盔 | 2600 | 9.8 | 500 |
| Crude Axe粗制斧 | 800 | 9.8 | 498 |
| Reinforced Mail Hauberk加固长身锁甲 | 2000 | 9.5 | 486 |
| Goedendag尖头棒 | 600 | 9.4 | 478 |
| Blunt Cleaver钝刃斩刀 | 600 | 9.1 | 464 |
| Two-Handed Wooden Flail双手木连枷 | 500 | 8.9 | 455 |
| Kettle Hat with Closed Mail覆面锁甲铁笠盔 | 2200 | 8.8 | 449 |
| Footman's Armor步兵甲 | 1600 | 8.4 | 429 |
| Nasal Helmet with Closed Mail覆面锁甲护鼻盔 | 2000 | 8.3 | 425 |
| Broken Ancient Sword古代断剑 | 200 | 8.3 | 425 |
| Goblin Skewer地精尖矛 | 300 | 8.3 | 425 |
| Woodcutter's Axe伐木斧 | 400 | 8.3 | 425 |
| Morning Star晨星钉锤 | 600 | 8.3 | 425 |
| Axehammer斧锤 | 800 | 8.3 | 425 |
| Falx镰刃刀 | 245 | 8.2 | 417 |
| Reinforced Boondock Bow强化荒野短弓 | 500 | 8.1 | 411 |
| Rondel | 400 | 8 | 408 |
| Warfork战叉 | 400 | 8 | 408 |
| Notched Blade缺口短刃 | 350 | 8 | 406 |
| Decayed Great Helm朽坏重型大盔 | 2000 | 7.8 | 400 |
| Flat Top with Mail锁甲平顶盔 | 1800 | 7.8 | 399 |
| Light Scale Armor轻鳞甲 | 1300 | 7.6 | 390 |
| Reinforced Wooden Flail强化木连枷 | 300 | 7.5 | 383 |
| Light Crossbow轻弩 | 300 | 7.5 | 383 |
| Hunting Bow猎弓 | 600 | 7.5 | 383 |
| Shortsword短剑 | 350 | 7.3 | 372 |
| Kettle Hat with Mail锁甲铁笠盔 | 1500 | 7 | 356 |
| Closed and Padded Flat Top厚衬封闭式平顶盔 | 1250 | 6.9 | 354 |
| Ancient Breastplate古代胸甲 | 900 | 6.7 | 340 |
| Mail Hauberk长锁甲 | 1000 | 6.7 | 340 |
| Bascinet with Mail锁甲尖顶盔 | 1400 | 6.7 | 340 |
| Direwolf Mail Armor恐狼锁甲 | 900 | 6.4 | 328 |
| Nasal Helmet with Mail锁甲护鼻盔 | 1250 | 6.3 | 319 |
| Steppe Helmet with Mail锁甲草原盔 | 1250 | 6.3 | 319 |
| Decayed Full Helm朽坏全覆盔 | 1500 | 6.3 | 319 |
| Ancient Scale Harness古代鳞甲 | 750 | 6 | 306 |
| Decayed Reinforced Mail Hauberk朽坏加固长身锁甲 | 1000 | 5.9 | 300 |
| Closed Flat Top Helmet封闭式平顶盔 | 1000 | 5.9 | 300 |
| Leather Scale Armor皮鳞甲 | 800 | 5.7 | 291 |
| Ancient Honor Guard Helmet古代荣誉卫士盔 | 1000 | 5.6 | 283 |
| Decayed Closed Flat Top With Mail朽坏锁甲平顶盔 | 1250 | 5.4 | 277 |
| Padded Flat Top Helmet厚衬平顶盔 | 800 | 5.3 | 272 |
| Zweihander's Helmet双手剑士盔 | 850 | 5.3 | 271 |
| Thick Plated Barbarian Armor蛮族厚板甲 | 1200 | 5.2 | 266 |
| Heavy Horned Plate Helmet重型角饰板盔 | 1300 | 5.2 | 265 |
| Cudgel | 350 | 5.1 | 263 |
| Direwolf Hide Armor恐狼皮甲 | 500 | 5 | 255 |
| Mail Shirt锁甲衫 | 650 | 5 | 255 |
As can be seen from the data, weapons are the most profitable items to repair. They are followed by armor and then helmet. A Boar Spear猎猪矛 has the same return than a Full Helm全罩盔!
This table shows that attacking targets like Orcs兽人, soldiers, mercenaries佣兵 or in general any faction with high tier equipment is well worth it in terms of loot value. Beasts carry no equipment and will only leave Trophies that can be sold or used as crafting components.
Undamaged loot does not need repairing. In that case, worth is the only parameter determining profitability which benefits armor and helmets. That's why successfully retrieving undamaged armor from enemies is very rewarding. That can be done for both armor and helmets by using daggers Puncture, a skill that completely ignores armor. And to retrieve armor only, by using flails Lash, a skill that directly targets the head.
Drop conditions
Items that belonged to slain enemies are not always found as loot. There are several conditions for an item to drop:
- Can be looted
- Not in the bag (enemy throwing weapons)
- Belonged to the player or an enemy (not an ally) killed by the player
- Enough durability left
- Weapon: > 11 (ammo > 0 for throwing weapons)
- Shield: > 5 & >= 25%
- Armor: > 30 & >= 25%
- Helmet: > 30 & >= 25%
- Successfully rolled
- Weapon: 90%
- Shield: 90%
- Helmet: 70%
The Northern Raiders北境劫掠者 origin gives an additional 15% chance to loot items even if some of the conditions aren't met (varies with the item type). If the item belonged to the player, durability conditions can be reduced or removed and there's no roll. Named and Legendary Items always drop. A bug will sometimes prevent armor (and maybe other items) from being awarded even if the conditions were met. If a looted item that cannot be swapped in battle (armor) has more than 66% of its maximum durability, there's a 50% chance that its durability will be set to a value comprised between the durability and 35% of the maximum durability.
Enemy weapons can apparently be more or less damaged at the start of a battle but they never lose durability during battle (and never break). It's always possible to know, after having killed its owner, if an item was destroyed or not by checking what has been left on the ground. If the item is there, it will show up as loot at the end of a successful battle (unless it was picked from the ground).
Raiding正在劫掠
Events
Events can also reward loot, for example:
Expenses
Cutting expenses is another reliable way to stay financially healthy. But some expenses are hard to reduce. There are two main sources of expenses:
- Purchases
- Wages
Purchases
Purchases cover everything that's bought from Supplies to other items like Weapons and Armor护甲 and upfront payment (which depends on Level等级 and equipment) for recruits. That first item of expenditure is highest in the early game when fresh members need equipment. That is when investing ensures that you will not otherwise spend more later.
Armor护甲 is the most difficult item to loot in the early game because low level recruits cannot afford to puncture enemies and get injured or even killed in the process. That's why buying cost effective Armor护甲 like Padded Leather衬垫皮甲 with the starting funds is a sound choice.
Later in the game, premium Character Backgrounds like Hedge Knights can be hired. They most often come with high tier Armor护甲 and Weapons. Recruiting them means buying equipment.
Weapons are easier to get than Armor护甲 because hitting the enemy won't damage them. Player Gazomierz gives good advice on that matter:
- Another reason not to buy stuff is rather simple, most of it can be looted. You can equip your entire band with mail [armor] and tier[]2 weapons on raiders alone. And that's what you should aim for.[2]
— Player Gazomierz
Damaged items have a reduced price. Is it worth it to buy them? In order to know, use the table provided in the Loot section. The higher the Worth per Durability, the more interesting it is.
Besides equipment, purchases include Supplies:
- Provisions口粮
- Tools and Supplies工具与修缮物资
- Ammunition弹药
- Medical Supplies医疗物资
Provisions口粮 are the only vital resource. This item of expenditure cannot really be saved upon or people will get Angry and desert the company. The amount that's needed can only be reduced by dismissing mercenaries or by buying cheaper types of Provisions口粮 like Ground Grain.
Tools and Supplies can be a major item of expenditure if enemies keep hitting party members and if the player keeps repairing damaged equipment. On that subject, Gazomierz has some insight:
- It's not really worth it to repair most of low tier gear as it's just so easy to replace it. Use one weapon, once it brakes switch to the next one.[2]
— Player Gazomierz
This can be said for Armor护甲 as well once the player feels comfortable enough to get regular replacements from enemies by using Daggers Puncture or Flails Lash skill.
- With [armor] it's a bit more tricky. You don't loot as much of it as you loot weapons. But if you have spare suits of low tier [armor] you can do the same thing. Just switch when it gets low. You're aiming at mail anyway, so [until] that just try to minimize [usage] of tools.[2]
— Player Gazomierz
Getting hit will not only damage equipment but may also cause Temporary Injuries if enough damage to Hit Points has been dealt. They can only be healed by Medical Supplies. Each day spent healing requires 1 . These Temporary Injuries can really incapacitate a mercenary for a long time, enough that dismissing him could be a safe financial choice.
Temporary Injuries and the costs they incur can be avoided by increasing Hit Points on Level等级 up or with Perks特长 like Colossus.
Ammunition expenses can rise up fast if several recruits are using Bows with Quick Shot. It is advised to mostly stick to Crossbows in the early game and slowly switch as the campaign progresses. Crossbows have better aim and use only 1 per attack.
Last but not least, Taverns will provide services for a fee. It's usually not worth it in the beginning to pay for those. Drinks will increase Morale士气 but only for a short time until it goes back to normal.
Wages
Wages can go out of hand quickly if left unchecked. The Roster size, the Character Backgrounds and their Level等级, the Greedy Trait and related Events define how high the wages will be.
Only 12 mercenaries can join a battle. So, keeping a count that is close to this number in the early stages of a campaign will do financial wonders. Not only in terms of wages but also in terms of Provisions口粮 consumed because each character requires 2 (?) per day.
Roster
How are mercenaries recruited?
Two ways:
- In settlements for a fee
- Via events for free
Always save at least one free spot in your party (unless playing Lone Wolf孤狼) in case an event triggers and if not, just to keep hiring new characters and replace the weakest link.
What backgrounds should I recruit?
Start with the backgrounds page for base information and answers to questions not examined here such as:
- What attribute scores can each background get, how do they rate and compare?
- Where can I find a specific background?
- Which events are associated with a specific background?
Cost and power
There are two main variables to consider when deciding on whether or not to hire a character:
- Cost
- Hiring fee雇佣费用
- Daily upkeep
- Power
- Attribute scores
- Possible traits
- Possible talents
Other secondary variables influence those. For example, true cost is higher if the equipment the recruit brought is useless and ends up being sold back. The cost is in part recovered if the equipment was to be bought anyway. Likewise, power depends on attribute rolls on level up and talents. But those are random and cannot be used as a basis to make a decision.
That said, specific traits and talents can be excluded for a particular background. These exclusions are not listed in full here but usually, trait quality is correlated to cost. One trait can be guessed through a given title (but having an eligible trait doesn't necessarily give a title). All possessed traits can be revealed for a fee with the try-out option (see the Should I try a recruit out? section).
Depending on the game stage, settings and play style, desired value ranges and ratios for these variables change. But as a rule, it’s obviously better to look for the most power for the cost. The most powerful backgrounds have an unfavorable ratio. Several good backgrounds have a favorable ratio while many average or poor backgrounds have an unfavorable ratio. Knowing what each offer for the price is therefore an excellent way to get better results.
How is a recruit hiring cost calculated?
The hiring cost depends on several variables:
- Background
- Equipment
- Level等级
The background defines a base hiring cost going from 30 for the worst ones up to around 150 for the best ones. Swordmasters are an exception with a base cost of 400!
The cost of equipment is set at 1.25 its base value. It is on the high side if compared to settlement prices. Levels are valued thus: 500 x (level – 1) ^ 1.5. With a possible range of 1 to 5, the additional cost goes from 0 to 3,000.
How is a recruit daily wages calculated?
Upkeep depends on the following variables:
- Background
- Random multiplier
- Levels
- Various (traits, events)
For levels, a distinction must be made between:
- The first 11 levels
- Veteran levels
Each background has a base daily cost which ranges from 3 to 35.
This base value is multiplied by a random number between 90% and 110%.
The result is then multiplied by 1.1 ^ (level – 1) for the first 11 levels (1 to 2.6 multiplier). Additional levels follow another, less costly formula. The cost of 11 levels is taken as a base and multiplied by 1.03 ^ (level – 11). For example, a level 11 Hedge Knight costs, with no other modifiers, 91. And on level 21, he costs 122 in daily upkeep.
The player character (Lone Wolf origin) doesn’t need any wages.
Should I recruit backgrounds to fit a role or make with what I get?
This question summarizes two approaches to recruiting. Backgrounds each have strengths and weaknesses. For example, a Deserter逃兵 will never get outstanding Resolve. Therefore, limiting negative Resolve checks (mostly from being surrounded) and positioning him in the back line is probably a good idea. But if the team is already lacking people to hold the front hiring a low Resolve background is probably not a good idea. However, if the recruit is at a discount why not just roll with it and adapt your team around it, especially if it's a great hire?
Both approaches can be combined. Sometimes, they naturally are. For example, Thieves have a high base Initiative and Defenses and make great candidates for the Dodge perk and generally swift, nimble front builds. At the same time, they have an excellent power per cost ratio and for that reason are almost always worth hiring.
These matters will be covered in more details in the builds section. The following sections are orientated towards an aggressive hire and dismiss style.
Which are the most cost-effective backgrounds for hire?
These are the backgrounds that offer the most stats and potential for the money:

Brawler拳斗者
- Best possible bargain but base upkeep was increased to 13 to reflect that
- Cannot get a talent in Ranged Skill


Wildman荒野人
- Highest possible base Fatigue and very high base Hitpoints (like Farmhands but with much better Resolve)
- Some of the worst Defense scores
- Not always cheap
- Levels up slowly (85% rate)

Thief盗贼
- Sellsword's Defense levels
- Second best base Initiative of hirable backgrounds
Another set of backgrounds with slightly lower ratios rounds up the list:

Militia民兵
- Very low upkeep
- Well-rounded stats (versatile) and high base Melee Skill

Lumberjack伐木工
- Very high base Fatigue and Hitpoints
- Slightly expensive

Farmhand农场帮工
- Very high base Fatigue and Hitpoints
- Cheap and easy to find
- Low Resolve

Messenger信使
- High base Fatigue

Butcher屠夫
- Less powerful but cannot get a talent in Ranged Skill
These last backgrounds do not have as much potential but they can still be cheap:
- Caravan Hand商队杂工
- Graverobber盗墓贼
- Houndmaster驯犬师
- Cultist邪教徒
- Gambler赌徒
- Gravedigger掘墓人
- Flagellant苦修者
- Ratcatcher捕鼠人 (net)
Which are the most powerful backgrounds for hire?
Cost aside, these backgrounds are the most powerful. They are mostly free from bad traits.

Hedge Knight流浪骑士
- Great attribute scores everywhere it matters
- Cannot get talents in Initiative or Ranged Skill
- Usually very expensive but the equipment can be useful

Sellsword佣兵
- Well balanced stats and fit for any role
- Easy to find and can be cheap to recruit

Adventurous Noble游历贵族
- Good attribute scores everywhere it matters
- Best possible base Resolve
- Low upkeep for the power

Hunter猎人
- Best possible base Ranged Skill
- Relatively cheap
A last background to consider is Swordmaster剑术大师. Swordmasters eventually get the Old trait and lose on core attributes but the WotN DLC introduced a legendary item to remove it. Hiring one is then recommended even though finding a cheap Swordmaster can prove difficult. Swordmasters have the highest starting Melee Skill and Defense of all backgrounds so they’re guaranteed to perform well in combat. They cannot get a talent in Ranged Skill.
Should I try a recruit out?
The try-out option reveals a recruit traits for a fee of whichever is lowest between:
- hiring cost − 25
- 25 + hiring cost × 0.1
To simplify, for most recruits (hiring cost > 55), this fee is roughly 10% of the hiring cost (see the Cost and power section for information about what's included in this cost).
Try-out reveals one part of the recruit power equation. Whether or not it ends up mattering depends on what traits the recruit got (0 to 2). Since attribute rolls and talents are a big part of the equation the value of this option is at the very least problematic. It should mostly be used to find great traits and to avoid bad ones on average or cheap backgrounds when a strong team has already been built. The idea being that new recruits of lesser backgrounds would need all of traits, attributes and talents to take the spot of a veteran. Premium backgrounds cannot usually get bad traits which further limits the usefulness of trying them out.
Try-out can also be used when lacking the money to hire all desired recruits.
Leveling
Perks特长
Builds
Equipment
How can I get named items?
Named items are stronger versions of the best normal weapons, armors and shields. All parameters (except Vision and Range) can be improved and new ones added but which ones are and with what values will determine how good and influential the named item is.
There are currently four main sources to acquire them from:
Enemy locations (hideouts)
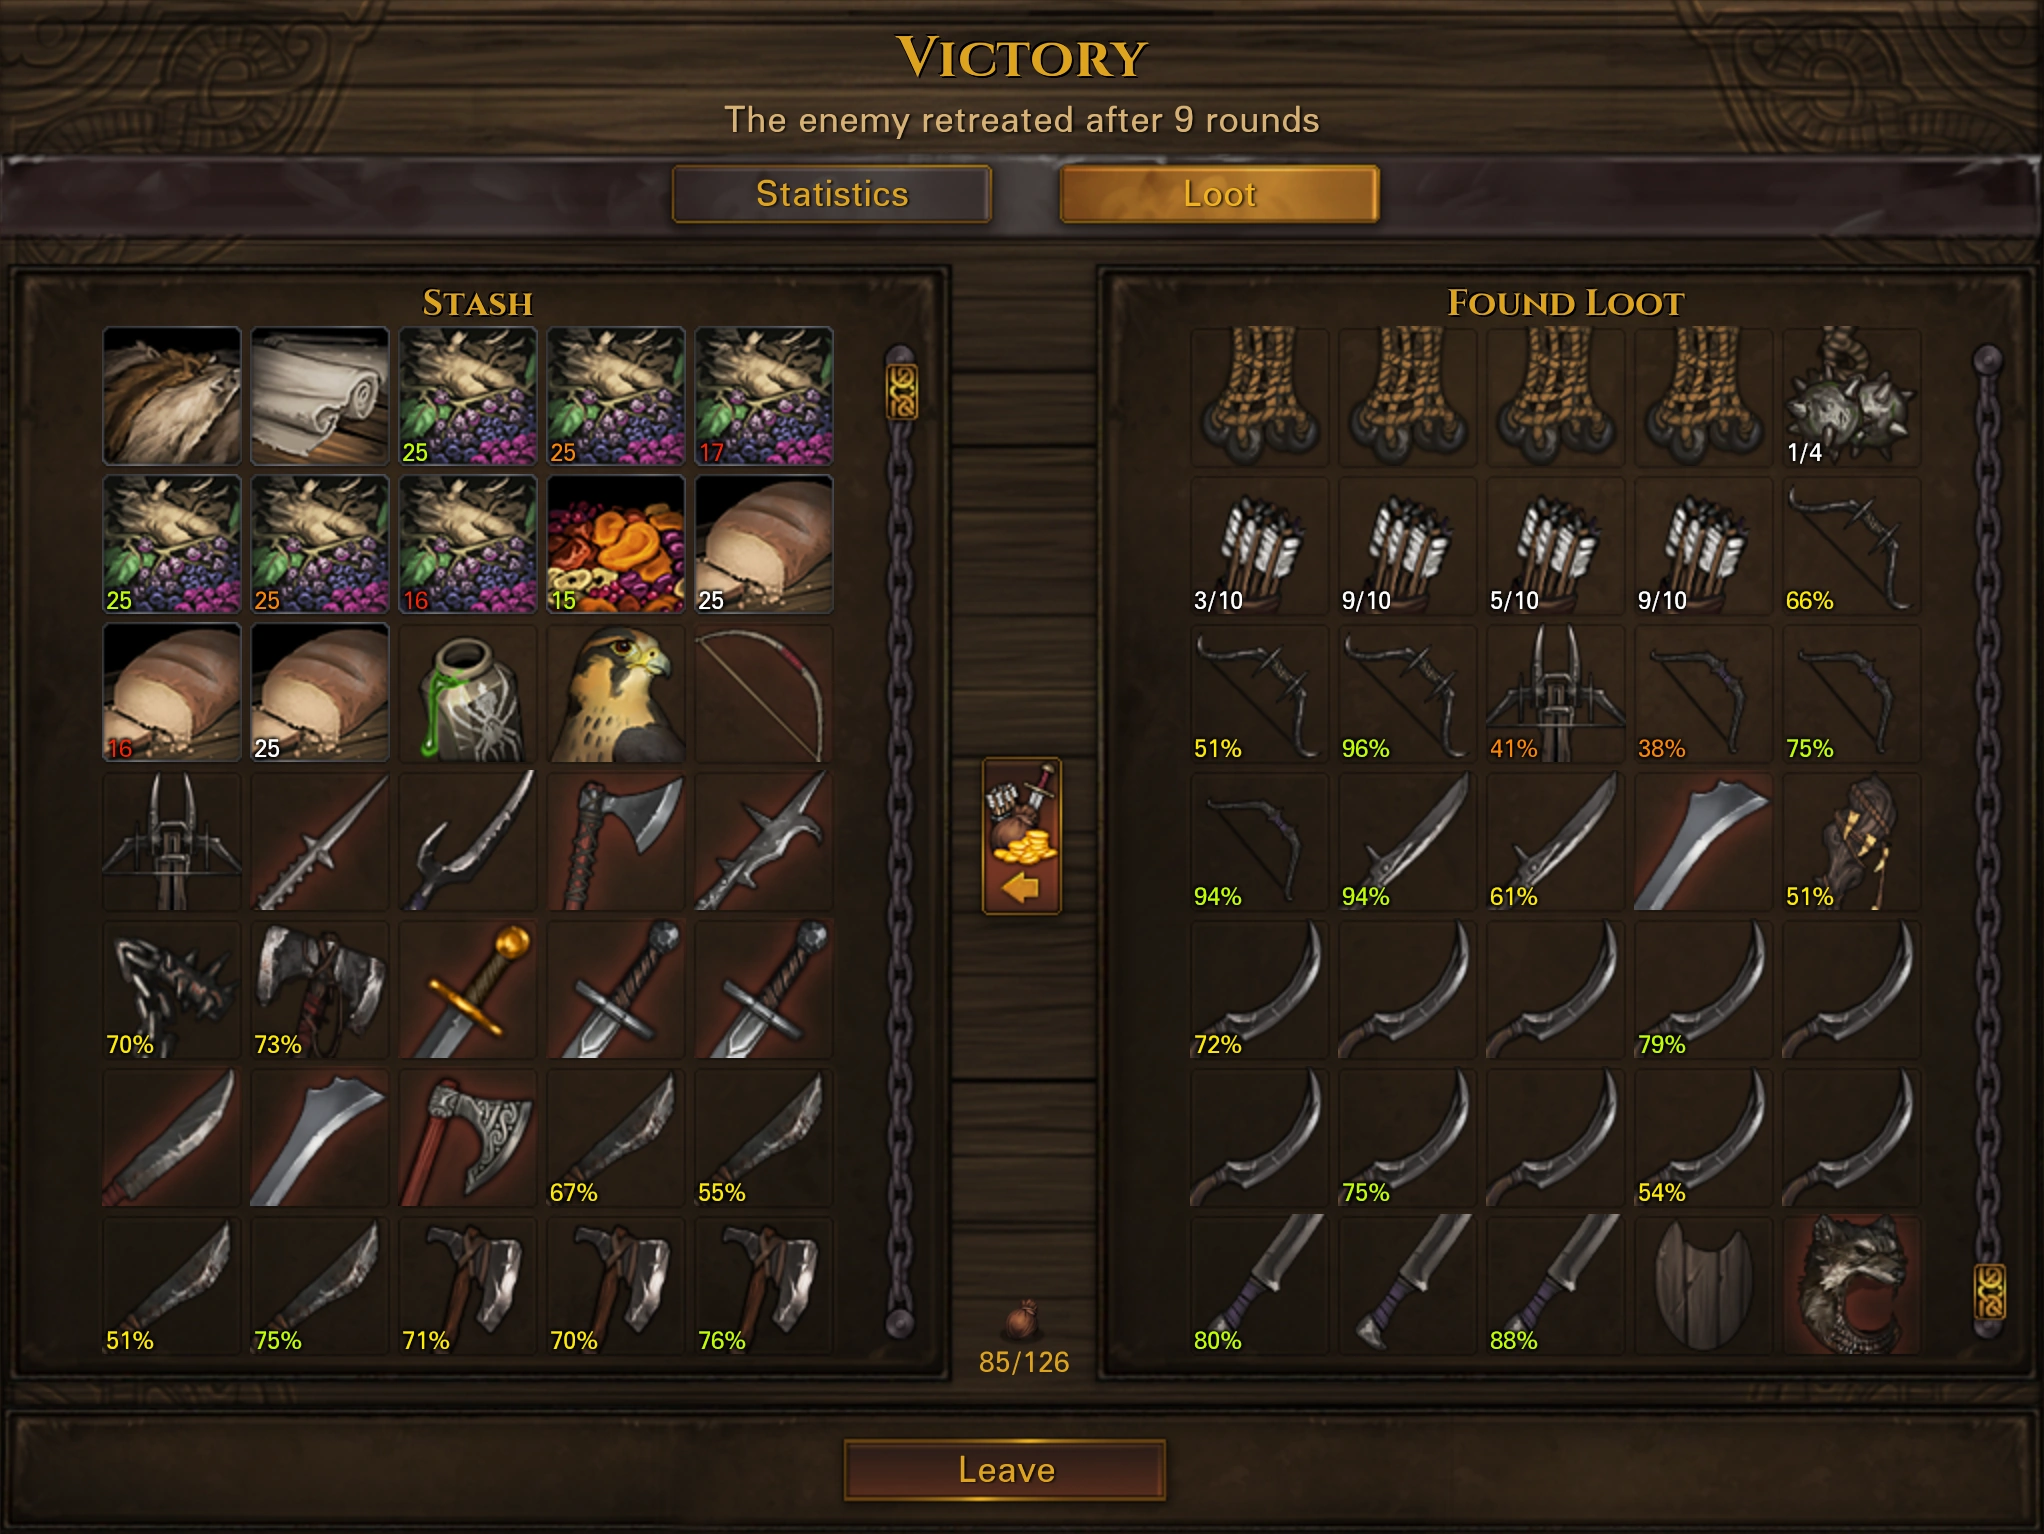 <a class="w-mw-file-description w-image" href="https://static.wikia.nocookie.net/battlebrothers/images/4/47/Loot_two_named.png/revision/latest?cb=20180914161038"><img alt="A location with two named items" class="w-thumbimage" data-image-key="Loot_two_named.png" data-image-name="Loot two named.png" data-relevant="1" data-src="https://static.wikia.nocookie.net/battlebrothers/images/4/47/Loot_two_named.png/revision/latest/scale-to-width-down/270?cb=20180914161038" decoding="async" height="203" loading="lazy" src="/wiki/media/462a9524a736969ca343b6aeb9a24bcb53f01d0928d70a78ba0465ab18112377.webp" title="Loot two named.png" width="270"/></a>
 A location with two named items
Up to two named items can be found in a same location and retrieved after destroying it. The chance for a location to hold named items increases with the location:
- Size (resources)
- Distance to the nearest settlement
Huge camps built far from civilization are most likely to contain a named item. The chances can range from 0% (and even negative numbers!) to 60% or more. The exact numbers are displayed in the log (...\Documents\Battle Brothers) when a location spawns on the map.
Contracts to destroy a location with and
and  ratings remove the named items they may contain. There are a few exceptions to this rule but it's generally safer to avoid taking anything less than a
  contract if the location to be destroyed is likely to contain a named item.
Tavern Rumors can point to locations with a named item. They will give out hints about the type of item that can be found there as well as the kind of enemies that occupy it. And they will give a general direction by which to find the location. The rumor doesn't add a new named item to the location but simply reveals it.
Named items belonging to a faction can only be found in locations and on champions of that faction.
Generated map layouts are stored in map seeds. Starting a new campaign with a same map seed will always generate the same map including locations and their named items (unless the save structure is modified by mods).
Champions (WotN)
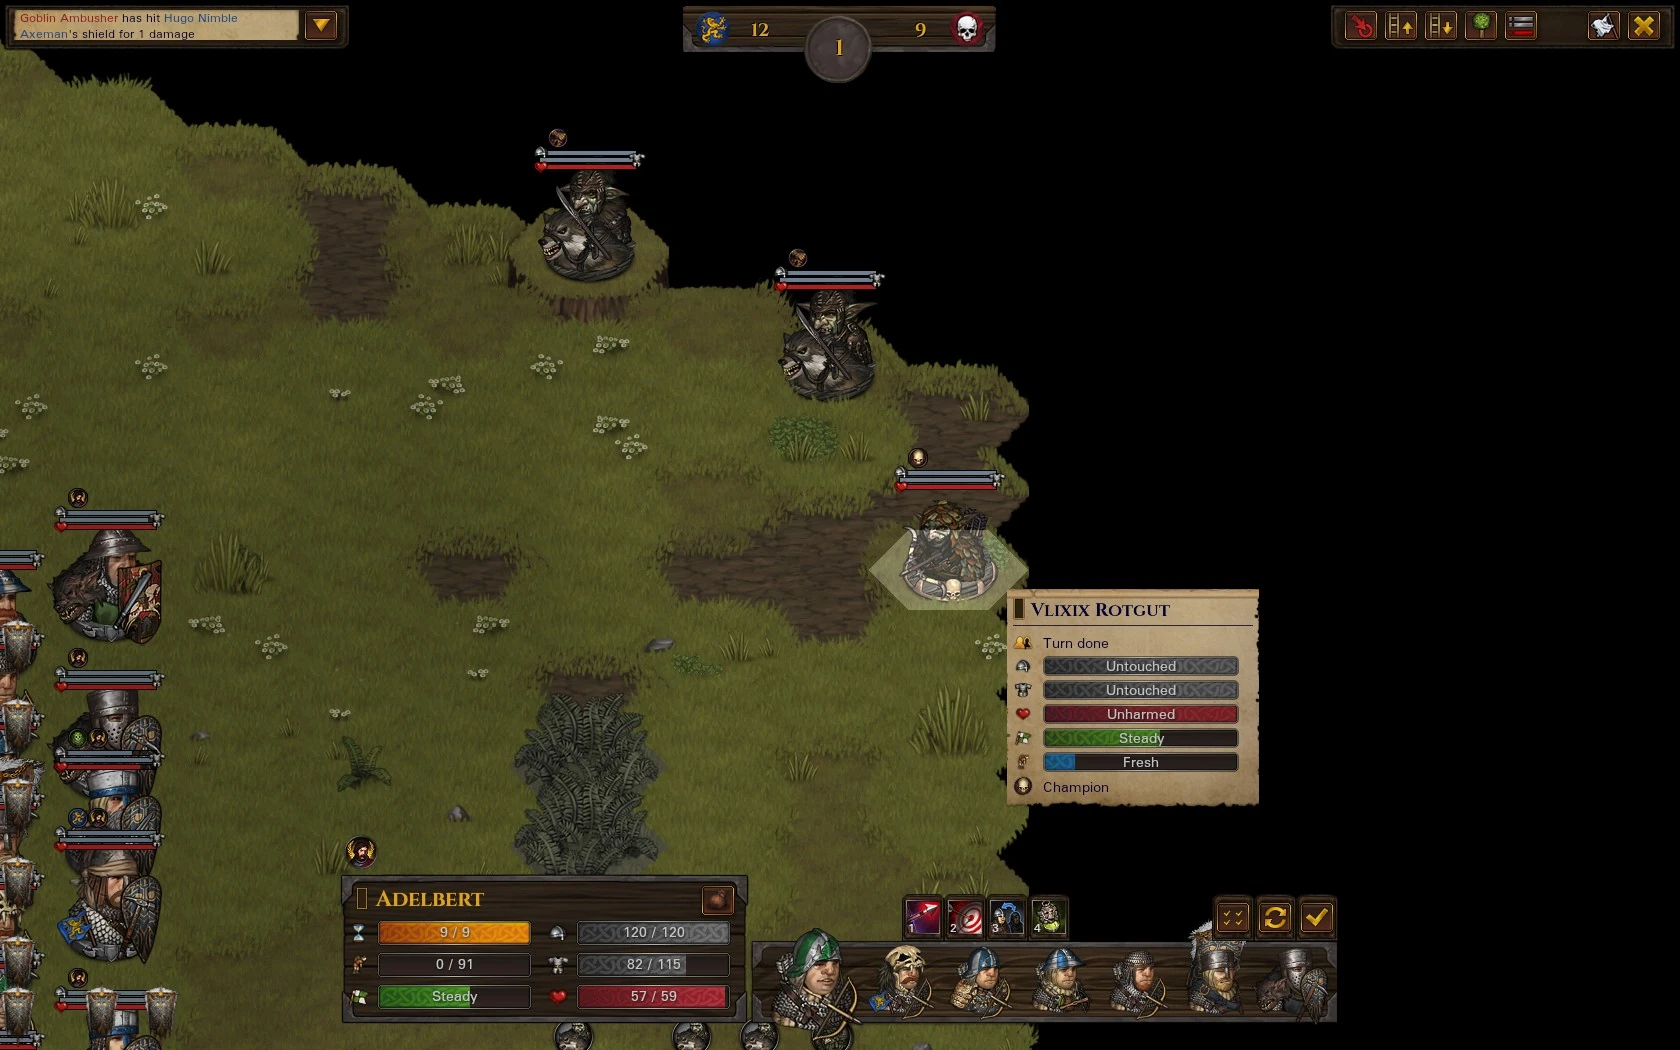 <a class="w-mw-file-description w-image" href="https://static.wikia.nocookie.net/battlebrothers/images/4/42/Champion_in_battle.jpg/revision/latest?cb=20190629205526"><img alt="A champion ambusher" class="w-thumbimage" data-image-key="Champion_in_battle.jpg" data-image-name="Champion in battle.jpg" data-relevant="1" data-src="https://static.wikia.nocookie.net/battlebrothers/images/4/42/Champion_in_battle.jpg/revision/latest/scale-to-width-down/270?cb=20190629205526" decoding="async" height="169" loading="lazy" src="/wiki/media/b39f554c9eef2a4b977ba458fdf6c67df26debf2a6d8d9f4697644495c6b78d5.webp" title="Champion in battle.jpg" width="270"/></a>
 A champion ambusher
Champions are to common enemies what named items are to normal items. They always carry one named item randomly selected among a custom list that reflects their faction or their preferences.
Only top tier enemies can become champions (excluding Goblins地精) and each of them has a set chance of becoming one. But that chance can be modified by:
- Contract difficulty
- −99% chance
- +5% chance
- Days < 101: −1% chance
Since most champions get a base 1% chance it's quite difficult to see many if not any before day 101. Contracts of difficulty against Goblins are most likely to generate at least one champion and probably more given how common skirmishers and ambushers are.
Specialized shops
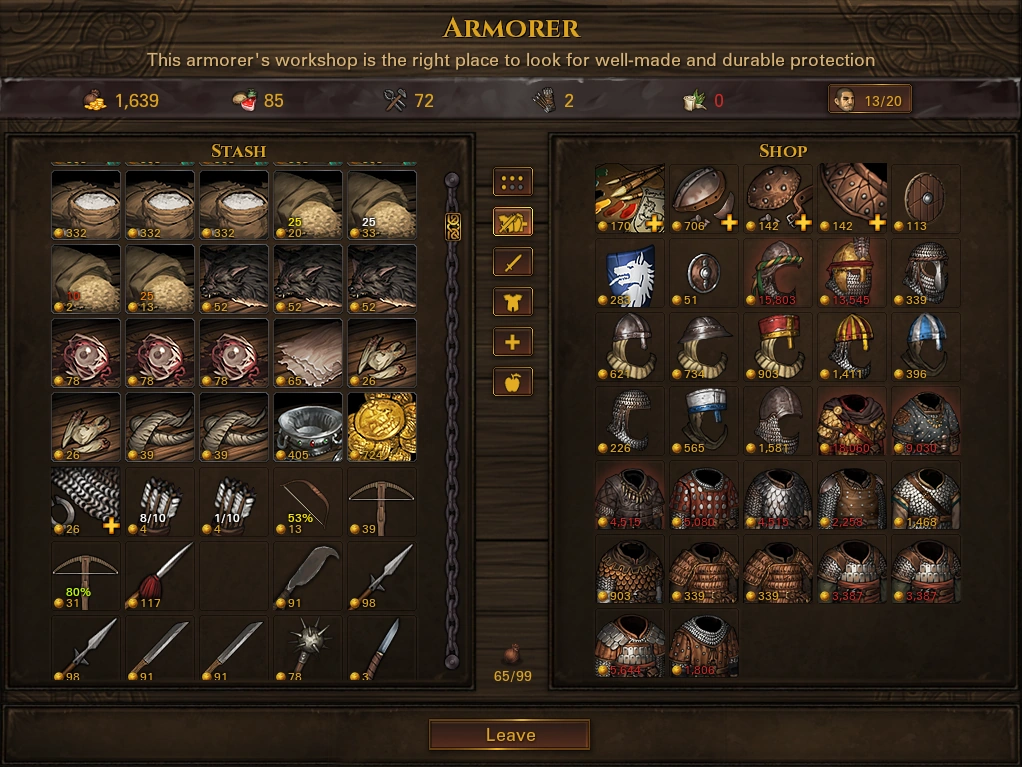 <a class="w-mw-file-description w-image" href="https://static.wikia.nocookie.net/battlebrothers/images/6/64/Shop_five_named.png/revision/latest?cb=20190128122642"><img alt="A shop with five named items" class="w-thumbimage" data-image-key="Shop_five_named.png" data-image-name="Shop five named.png" data-relevant="1" data-src="https://static.wikia.nocookie.net/battlebrothers/images/6/64/Shop_five_named.png/revision/latest/scale-to-width-down/270?cb=20190128122642" decoding="async" height="203" loading="lazy" src="/wiki/media/6a94e6e15afe9d1cb506b751f987a8fe2daff48a979bb557f8cbd8a95ae719d7.webp" title="Shop five named.png" width="270"/></a>
 A shop with five named items
All shops excluding the market have a slight chance to sell a number of named items for a limited period of time which can extend to 3 days before the shop replenishes its stock or gets forcibly restocked by a settlement situation.
The following shops will sell named items that are not restricted to a faction:
- Weaponsmith武器匠: all named melee weapons (but not named shields)
- Fletcher弓弩匠: all named ranged weapons
- Armorer制甲师: all named armors and named helmets (excluding the Lindwurm set)
- Alchemist炼金工坊: named handgonne
So shops have more or less named item types to offer. Each type has a chance to be selected for another check that will determine if it is available for sale. Each type rolls for selection according to its shop:
- Weaponsmith: 30%
- Fletcher: 50%
- Armorer: 33%
This ensures some balance in what is offered between all item categories.
After that, each selected item rolls for availability. The base rarity for a named item type is 1%. Three 0-100 rolls are made and checked against the rarity. The rolls range is modified by settlement situations. Positive situations can increase the range and the likelihood that shops will offer more (named) items. These are:
 Well Supplied供货充足
 Safe Roads道路安宁
 High Spirits欢欣鼓舞
 Seasonal Fair时令集市


On the contrary, several negative situations decrease the range and almost always prevent named items from appearing in shops at all.
Events
Some 一些events can reward named items. See their respective page for details:
A Historian历史学者 is needed for the item to be named (a named shield). All types but the Orc and Undead kind can be acquired.
- Shady Character Offers Map (reveals a location containing a named item)
Without a Historian历史学者 the map will not always be readable.
Depending on dialog choices, it will either reward a named axe, a named spear, a wolf helmet or a hardened leather armor.
Depending on dialog choices, it will reward a named dagger with a 1 in 6 chance.
Depending on dialog choices, it will either reward a named dagger, a studded mail armor or a named greatsword.
To gain a named qatal dagger you need a Belly Dancer肚皮舞者.
To gain a named crossbow you need a Witchhunter猎巫人
- Changing Sides (random named item among a limited list)
- Oracle (named dagger)
- Man in Forest (named dagger)
- Merchant in Distress (can reveal an Undead location containing a named item)
- Spartacus (can reveal an Undead location containing a named item)
Combat
Worldmap
Battle Brothers is as much combat tactics than company management. While traveling on the worldmap, strategic decisions must be made that will affect the progression of the team and the type and difficulty of the next encounters.
Ambitions
Ambitions are the most efficient way to improve renown in the early game. Since contract payment increases with renown (see How much do [contracts] pay?), taking and fulfilling ambitions should be a priority. Normally, each ambition can only be completed once.
What ambition should I pick in the early game?
Carefully choosing ambitions will help chain them and rake in renown. Some ambitions can be completed at all times while others will be locked if their conditions were met before they were offered and selected. Deciding on what ambition to take thus depends on several factors. Predicting what's likely to occur and when is key to making the right decision.
The goal of early game ambitions is not only to increase renown but to unlock noble contracts with the Reach 'Professional' Renown ambition. The following is a suggestion on what ambition to choose and in what order to reach that point as quickly as possible.
- Get to 'Friendly' relations with a civilian faction与一个平民势力达到“友好”关系
- Have a roster of at least 12 men战团人数达到至少12人
- Have at least 2,000 crowns (Battle Standard)
- Discover a ruin or hostile camp, and destroy it
- Have one man with the 'Rally the Troops' perk
- Win a battle against 12 or more enemies赢得一场对阵至少12名敌人的战斗
- Reach 'Professional' renown (1,050)
The Visit All Settlements ambition was intentionally left out because there's almost always at least one settlement that is very hard to reach and to do so would waste precious time and resources. In case it were not, the ambition could be selected at any point.
| Ambition 战团抱负 | Locking condition |
|---|---|
| 1° Get to 'Friendly' relations with a civilian faction | |
| Probably the easiest ambition to complete. And since it does have a locking condition, it should be taken first. The Peasant Militia origin starts with a friendly town so it cannot take this ambition. Friendly means a relations rating ≥ 70. Each successfully completed contract gives +10 relations with the settlement (base is 50). Note that negotiating contracts can decrease relations (see Should I negotiate for better payment?). | Friendly with a settlement |
| 2° Have a roster of at least 12 men | |
| Debatable as a second because some players intentionally keep a small roster to reduce contract difficulty (see What influences contract difficulty?). That said, going to 12 as soon as possible will fasten progression (experience, equipment and monetary gains). The ambition will be locked if the roster already has 12 men so be sure to stay under that number to access this ambition. The Peasant Militia origin doesn't get this ambition but another with a 16 men requirement. | Roster of 12 Peasant Militia 农民民兵 |
| 3° Have at least 2,000 crowns (Battle Standard) | |
| This ambition is not only easy to fulfill it's also very useful in the early game because it rewards the Battle Standard战旗, a slightly weaker Pike长枪 with a Resolve aura. Note that due to how ambitions are processed, there could be a delay between the fulfillment of the conditions and the actual completion of the ambition. This can be problematic because of wages and in the case of relations because of their daily decay. Camping will sometimes reduce the delays. Alternatively, a fix can be downloaded[3]. The actual cost for the Battle Standard is 1,000 crowns. Make sure to have a free inventory slot or the ambition won't complete! Seemingly, if the Standard is lost, the ambition can be taken again. | |
| 4° Discover a ruin or hostile camp, and destroy it | |
| This one is harder because finding camps that can be destroyed early on is tricky. But it should still be taken fairly early because it has a locking condition. Brigand and Undead camps would be likely targets though fighting more than 12 enemies would lock the ambition to do so. Location destroyed under contract do not count towards the fulfillment of the ambition. But you can combine it with the Discover Location contract. | Destroyed a camp (no contract) |
| 5° Have one man with the 'Rally the Troops' perk | |
| By that time, some of your mercenaries should have reached level 4 to pick Rally the Troops. It doesn't even have to be your standard bearer or your sergeant. Any recruit will do. This ambition will not appear before 16 days have passed but you can prepare for it by picking the perk before it does. Since locking conditions for this ambition are rather unlocking ones, it can be selected later if you are not able to complete it immediately and fear losing access to more restrictive ambitions. | Less than 16 days passed Banner ambition not done |
| 6° Win a battle against 12 or more enemies | |
| Finding 12 or more enemy groups outside of camps can prove difficult in the early game. The most probable target would be an Undead camp filled with Wiedergangers行尸. But contracts with higher rating to defend a settlement can spawn large groups of enemies. Parties of beasts that rely on number like Webknechts巨蛛 and Nachzehrers食尸鬼 can also help fulfill this ambition. Having defeated 12 or more enemies will lock this ambition so it could be selected earlier if big battles are expected. | Defeated 12 or more enemies Banner ambition not done |
| 7° Reach 'Professional' renown (1,050) | |
| This is the final goal of the early game ambitions. The one that will unlock a score of other ambitions to choose from later. How close you are to the Professional level will depend on what origin you chose and on the number of contracts and battles you completed. Origins may start with as low as −100 renown or with a positive 200 renown. The Trading Carvan earns only half renown. Six completed ambitions will give out 600 renown. Failing at or cancelling contracts and ambitions, losing battles and retreating will reduce renown. | Less than 3 ambitions done Banner ambition not done |