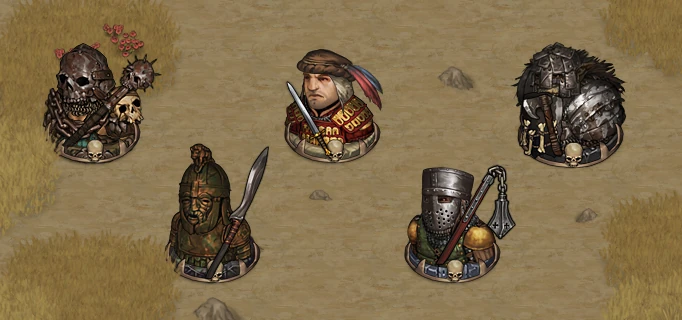
Champions are stronger versions of enemies that always have a named item. They have a skull mark on their tokens, and generate with unique names. Only certain enemies can become champions.
Mechanics
Each type of enemy has its own base chance to spawn a champion instead of a regular enemy. However, there are conditions that can affect this chance. These modifiers are additive.
| Condition | Modifier |
|---|---|
| 1 skull contract | -99% |
| 3 skulls contract | +5% |
| Before day 90 | -1% |
| Bounty Hunter赏金猎人 | +3% |
Most champions have extra perks特长 in comparison to their regular counterparts, and their attributes are also increased.
Actually, it is the special Champion perk that is responsible for increasing stats. Modifiers are conditional, based on the enemy base defense values. 20 points in either melee or ranged defense, or 15 in both, cause the set with extra defense to apply, otherwise it will be the one with extra HP.

|

|

|

|

|

|

|

|

|

| |
|---|---|---|---|---|---|---|---|---|---|---|
| Base modifiers | 1.35 | 1.15 | 1.15 | 1.25 | 1.25 | 1.5 | 1.15 | 1.5 | 1.15 | 1.5 |
| HP variant (extra) | 1.35 | |||||||||
| HP variant (total) | 1.8225 | 1.15 | 1.15 | 1.25 | 1.25 | 1.5 | 1.15 | 1.5 | 1.15 | 1.5 |
| Defense variant (extra) | 1.25 | 1.25 | ||||||||
| Defense variant (total) | 1.35 | 1.15 | 1.15 | 1.5625 | 1.5625 | 1.5 | 1.15 | 1.5 | 1.15 | 1.5 |
Modifiers are multiplicative. A regular Swordmaster剑术大师 has 80 base melee defense and a champion精英勇士 has 80*1.5625 = 125. If an enemy has a damage modifier, it is multiplied as well. Final values are rounded down.
It's important that these modifiers are applied after shields, Dodge闪避, Fast Adaptation快速适应, extra weapon accuracy and such. They are multiplied as well! So if you attack a champion Knight with 20 base melee defense and a Heater Shield熨斗形盾 that gives 25 with Shield Expert盾牌精通, don't expect it to be 20*1.5625+25 = 56. It is (20+25)*1.5625 = 70, so your accuracy will be reduced by 60 (not 70, because all defense above 50 has half effect). Dodge闪避 benefits from both initiative and defense increase.
Named weapons, armors and helmets always drop, even with zero durability, but named shields are destroyed if they break!
Units
Values in parentheses represent stats modified by Champion perk, or possible named armor durabitity.
| Icon | Name |
|

|

|
|
|
|
|
|
|
|

|

|

|
|
|---|---|---|---|---|---|---|---|---|---|---|---|---|---|---|---|
 |
Ancient Honor Guard古代荣誉卫士 | 65 (118) | 180 | 180-210 | 75 (86) | - | 5 (6) | 5 (6) | 110 (165) | 70 (80) | - | - | 9 | 1% | 350 (525) |
 |
Barbarian Chosen蛮族神选战士 | 130 (236) | 145-190 (231-375) | 140-230 (143-350) | 75 (86) | 60 (69) | 15 (18) | 10 (12) | 90 (135) | 115 (132) | 140 (210) | 20 | 9 | 1% | 350 (525) |
 |
Barbarian King蛮族之王 | 150 (273) | 250 | 270 | 80 (92) | 65 (74) | 15 (18) | 10 (12) | 110 (165) | 115 (132) | 150 (225) | 25 | 9 | 10% | 500 (750) |
 |
Blade Dancer剑舞者 | 90 (121) | 60 | 120-140 (126-143) | 90 (103) | 50 (57) | 50 (78) | 30 (46) | 90 (135) | 125 (143) | 130 (195) | 20 | 9 | 2% | 450 (675) |
 |
Brigand Leader强盗头目 | 100 (182) | 90-250 (137-362) | 90-210 (126-400) | 75 (86) | 65 (74) | 15 (18) | 10 (12) | 70 (105) | 125 (143) | 130 (195) | 20 | 9 | 1% | 375 (562) |
 |
Desert Stalker沙漠潜猎者 | 80 (108) | 0-45 | 105 (126-143) | 65 (74) | 85 (97) | 15 (23) | 25 (39) | 70 (105) | 140 (161) | 135 (202) | 20 | 9 | 2% | 450 (675) |
 |
Fallen Hero陨落英雄 | 180 (328) | 0-255 | 85-260 | 60-65 (69-74) | - | 5 (6) | 0 | 110 (165) | 60 (69) | - | - | 7 | - | 250 (375) |
 |
Gladiator角斗士 | 110 (148) | 0-225 (137-362) | 100-155 (126-400) | 75 (86) | 65 (74) | 20 (31) | 10 (15) | 90 (135) | 125 (143) | 135 (202) | 20 | 9 | 2% | 350 (525) |
 |
Goblin Ambusher地精伏击手 | 40 (54) | 25 | 35 | 60 (69) | 75 (86) | 10 (15) | 20 (31) | 45 (67) | 140 (161) | 100 (150) | 15 | 9 | 1% | 250 (375) |
 |
Goblin Skirmisher地精游击兵 | 40 (54) | 40-90 | 45-90 | 75 (86) | 65-70 (74-80) | 20-25 (31-39) | 10-15 (15-23) | 55 (82) | 130 (149) | 100 (150) | 20 | 9 | 1% | 200 (300) |
 |
Hedge Knight流浪骑士 | 150 (202) | 280-300 | 210-320 (264-400) | 85 (97) | 50 (57) | 25 (39) | 15 (23) | 90 (135) | 105 (120) | 160 (240) | 25 | 9 | 2% | 450 (675) |
 |
Knight骑士 | 135 (182) | 300-320 (291-350) | 210-360 (231-400) | 90 (103) | 60 (69) | 20 (31) | 10 (15) | 90 (135) | 115 (132) | 140 (210) | 20 | 9 | 2% | 450 (675) |
 |
Master Archer神射手 | 80 (108) | 0-30 | 35-115 (126-175) | 65 (74) | 85 (97) | 15 (23) | 25 (39) | 70 (105) | 140 (161) | 135 (202) | 20 | 9 | 2% | 450 (675) |
 |
Necromancer亡灵法师 | 50 (91) | 30-40 | 55-80 | 50 (57) | - | 5 (6) | 10 (12) | 90 (135) | 90 (103) | 90 (135) | 15 | 9 | 1% | 400 (600) |
 |
Nomad Executioner游牧刽子手 | 170 (229) | 125-290 | 230-285 (231-362) | 85 (97) | 50 (57) | 30 (46) | 20 (31) | 90 (135) | 115 (132) | 160 (240) | 25 | 9 | 2% | 450 (675) |
 |
Nomad Leader游牧首领 | 100 (135) | 125-200 (220-362) | 105-200 (231-362) | 75 (86) | 65 (74) | 20 (31) | 15 (23) | 75 (112) | 125 (143) | 130 (195) | 20 | 9 | 1% | 375 (562) |
 |
Oathbringer誓约使者 | 125 (168) | 250-300 | 300 (231-356) | 80 (92) | 50 (57) | 20 (31) | 5 (7) | 130 (195) | 135 (155) | 160 (240) | 25 | 9 | 1% | 375 (562) |
 |
Officer军官 | 110 (148) | 200-290 (220-362) | 135-290 (231-362) | 85 (97) | 60 (69) | 25 (39) | 15 (23) | 80 (120) | 110 (126) | 130 (195) | 20 | 9 | 1% | 350 (525) |
 |
Orc Warlord兽人军阀 | 300 (546) | 500 | 500 | 80-85 (92-97) | 40 (46) | -10 (-8) | -10 (-8) | 90 (135) | 125 (143) | 250 (375) | 30 | 8 | 10% | 500 (750) |
 |
Orc Warrior兽人战士 | 200 (364) | 240-360 | 280-400 | 70-75 (80-86) | 40 (46) | -10 (-8) | -10 (-8) | 75 (112) | 120 (138) | 200 (300) | 30 | 8 | 1% | 400 (600) |
 |
Swordmaster剑术大师 | 70 (94) | 0-200 | 115-190 (126-143) | 100 (115) | 50 (57) | 80 (125) | 15 (23) | 90 (135) | 115 (132) | 115 (172) | 20 | 9 | 2% | 450 (675) |
Tips
- Most champions have resolve so high that Fearsome威慑 becomes useless. It also causes non-undead亡灵 champions to become confident if they see their enemy die. Confident morale applies an additional multiplier to their already high stats.
- Their high accuracy allows them to reliably hit evasive characters.
- With increased damage, named weapons and Crippling Strikes致残打击 they can inflict injuries very early no matter what. Iron Will Potion钢铁意志药剂 gives immunity to them.
- Indomitable不屈 allows to decrease unavoidable damage.
- Have some means of escape: Rotation换位, Footwork灵活步法 or a Smoke Pot烟雾罐.
- Champions can be grouped into types:
- Dodgers.
- These are nearly impossible to hit in melee.
- Examples: Swordmaster剑术大师, Blade Dancer剑舞者.
- Nets and ranged weapons, preferably throwing, are required to fight them. Poisons work well.
- Heavy hitters.
- These deal very high damage and sometimes are capable of killing a brother in one hit of a named two-handed weapon.
- Examples: Nomad Executioner游牧刽子手, Barbarian King蛮族之王.
- Stunlock is effective against them. Some champions require nets or disarm缴械.
- Shield carrying.
- These rely on a shield to achieve high defense values, and are usually heavily armored.
- Example: Knight骑士.
- Two-Handed Flail双手连枷 has both armor penetration and accuracy against shields, and you may want to use nets for extra hit chance. Alternatively, you can just break the shield, but you won't loot a named shield this way.
- Ranged.
- These can deal damage from range and pick targets.
- Examples: Master Archer神射手, Desert Stalker沙漠潜猎者.
- Engage them in melee as soon as you can. Prefer nighttime.
- Easy ones.
- Everyone who lacks threat and defense falls into this category.
- Dodgers.
Description
Champions are particularly skilled and experienced individuals of any non-beast faction. They’re guaranteed to carry one Named Item and have significantly increased stats over their brethren. You’ll be able to easily recognize them by their special base and unique name. They are, in a way, minibosses. They challenge you to fight hard to claim what is theirs, and they shake things up, but prevailing against them will always reward you with the Named Item they carry – be it weapon, shield, armor or helmet.
So where do you meet champions? The most reliable way is to complete Contracts with a difficulty rating of  three skulls. Those have always been a high risk proposition for any mercenary company, but they now come with more of a reward for taking that chance: the possibility of getting named gear by facing enemy champions. Another way is to simply play into the late game. The further along your campaign, the more likely that you’ll find champions roaming the world outside of Contracts or defending a location.
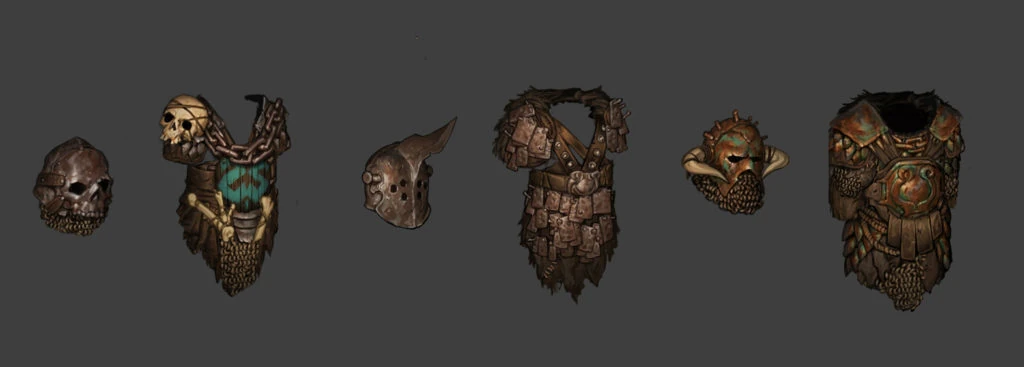
While champions may prove challenging to defeat, they are significantly easier to beat than some of the battles around Legendary Locations. This way, they can also fill the gap in challenge between defeating your first late game crisis and starting to take on Legendary Locations, like the Black Monolith, with your company.[1]