中文译文
回合制战术战斗是《战场兄弟》的核心。战场由六边形网格组成,并包含高低差、障碍物、地形与控制区域机制。行动点(AP)限制单位每轮能够进行的移动、技能施放等行动次数,先攻则决定各战斗单位的行动顺序。[1]
每轮战斗中,先攻最高的角色最先行动,其余角色依先攻高低依次行动。累积疲劳,以及护甲、武器或其他效果造成的疲劳上限惩罚,都会降低先攻。因此,如果一名角色比敌人更快陷入疲劳,他的行动顺序可能很快从最前落到最后。
行动点(AP)
移动、攻击、使用特殊技能或消耗品等行动都需要花费行动点,行动点在每轮开始时恢复。所有佣兵和大多数敌人拥有 9 点行动点;少数单位较少,例如行尸;也有单位更多,例如恐狼和地精狼骑手。
在草地、平原或道路等平坦地面上移动需要 2 点行动点。森林、积雪等崎岖地形通常需要 3 点,但部分地块仍只需 2 点,例如薄雪地块。沼泽中的浑水地块需要 4 点。每跨越一格高低差,行动点消耗额外 +1。大多数单手武器攻击消耗 4 点行动点;例外是学习精通后的匕首攻击,仅消耗 3 点。双手武器攻击通常消耗 6 点;例外是长刃战刀、镰刃长剑和双手砍刀,其普通攻击消耗 4 点,而锯齿长枪消耗 5 点。
通常,双方会以线列阵形开战:我方纵深为 1-2 排,敌方可能更深,双方之间至少相隔 5 格。人类单位每移动一格至少需要 2 点行动点,因此无法在 1 轮内接近到近战距离;恐狼和地精狼骑手则能在 1 轮内跨越这段距离。弓在平地上的射程为 7 格,精通后为 8 格;弩为 6 格,因此双方在第 1 轮开始时就已进入远程单位的射程。
疲劳
- 更多信息见疲劳(属性)
除了行动点,战场上的所有武器攻击和移动都会累积疲劳,因此疲劳达到上限的角色既不能攻击,也不能移动。每名角色在自己的回合开始时恢复 15 点疲劳。按正式版 1.1 的规则,闪避或格挡一次攻击会累积 2 点疲劳,被攻击命中则累积 5 点。
控制区(ZoC)
持有近战武器、赤手空拳或属于野兽的单位(梦魇和女巫除外),会对相邻地块施加控制区域。任何单位尝试离开敌方控制区域时,都会遭到控制该地块的敌人自动攻击;发动这种攻击不消耗敌人的疲劳。只有所有攻击都落空,移动单位才能离开;只要有一次命中,本次移动就会失败,必须再次尝试。
持有弓、标枪等远程武器的单位,以及溃逃或眩晕的单位,都不会施加控制区域。烟雾罐能让受影响地块的控制区域失效 1 回合。“灵活步法”允许安全穿越控制区域;“换位”则可通过与另一名非敌对单位交换位置离开。被缠绕、陷入恐惧或处于睡眠中的单位,也会失去施加控制区域的能力。
命中率
- 另见: 命中率
基础命中率会在选中技能并将鼠标移到目标上时显示,其基本计算方式为:佣兵的近战命中减去目标的基础近战防御。[2]
这一数值还会受到下列因素的修正。
- 装备、高低差和包围加成以加法计入。例如,近战命中为 70 的攻击者攻击近战防御为 0 的目标时,命中率为 70%。如果另有一名友军与目标相邻,形成包围,攻击者就会获得 +5% 命中加成,最终命中率为 75%。
- 士气加成或惩罚,以及伤势惩罚,以乘法计入。例如,一名在士气“镇定”时远程命中为 86 的弓箭手,进入“斗志昂扬”状态后,实际远程命中为 94(+10%)。
盾牌(下文详述),以及闪避、盾牌精通、长兵优势等特长,都能提高防御。不过,近战防御超过 50 后会出现收益递减:超出 50 的每一点近战防御,其实际效果减半。[3] [4]
发动攻击时,系统会进行一次 d100 掷骰,即在 1 到 100 之间随机取一个数。若结果低于命中率对应的数值,攻击就会命中。随后,系统再进行一次 d100 掷骰,判断是否命中头部。[5]
装备
- 某些武器带有命中加成。例如,草叉、长枪和战旗在使用“贯刺”技能时拥有 +10% 命中率。
- 武器技能也会提供加成,例如剑类的挥斩提供 +10% 命中率,长矛类的挺刺提供 +20% 命中率。
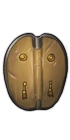
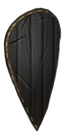
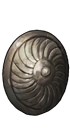
- 盾牌提供可观的防御加成,显著降低持盾者遭受攻击时的被命中概率。常见盾牌如下:
| 小圆盾 | 木盾 | 阿达尔加盾 | 鸢形盾 | 西帕尔圆盾 | 熨斗形盾 |
|---|---|---|---|---|---|

|

|
|
|
|
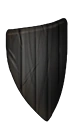
|
+10  + 5 
|
+15 +15
|
+15 +20
|
+15 +25
|
+18 +18
|
+20 +15
|
在战斗中使用盾墙,可使盾牌防御加倍,其中包括盾牌精通带来的加成。每有一名同样使用盾墙的相邻友军,还可额外获得 +5 防御。小圆盾不属于常规盾牌,装备它的佣兵无法使用盾墙。面对难以避免的大量伤害时,例如必须顶着敌方远程火力前进,盾墙能大幅提高前排佣兵的防御。
击退能将目标推开 1 格,消耗 4 点行动点和 20 点疲劳,并获得固定 +25 命中加成;地形和包围加成照常生效。与普通攻击不同,击退不会直接造成伤害,其掷骰结果也不会显示在战斗日志中。若游戏允许对免疫击退的敌人使用这一技能,结果只会是落空。这也适用于长枪同时具有击退和踉跄效果的“逼退”:不能因为敌人只免疫击退,就认为它仍会受到踉跄效果;实际上不会。
地势高度
战场地面的高低差以高度层级表示,例如山丘。站在高处时,你对低处敌人的命中率提高,敌人攻击你的命中率则降低。
跨越高低差比同高度移动消耗更多行动点和疲劳。探路者可取消额外行动点消耗,因此探路者尤其适合长柄武器或双手武器使用者,让他们在跨越高低差后仍能攻击。它对远程佣兵也很有用:高处能带来明显优势,而探路者能帮助他们更轻松地调整位置。
游戏中有以下高度层级:
- 平地(高度0)

- 1. 地势高度

- 2. 地势高度

- 3. 地势高度


站在比对手更高的位置时,你获得 +10% 命中率,而对手攻击你时承受 -10% 命中率惩罚。因此,占据高地通常更有利。AI 会尽可能争夺高地,尤其是其远程单位。
远程武器每高出一个高度层级,射程就增加一格;攻击较低处的目标时,命中率也会提高。
相邻地块上的对立角色,只有高度差不超过一层时才处于彼此的近战攻击范围内。若高度差达到两层或更多,即使地块相邻,也不算进入近战攻击范围,双方也不会对彼此施加控制区域。
包围
当至少两名单位与同一个敌对目标相邻时,就会形成包围。从第一名之外的每名包围者起,友军对该目标的近战命中率各增加 +5%。这一规则同时适用于敌我双方。[6]眩晕或持有远程武器的佣兵不会提供包围加成。[7]农民、其他佣兵、贵族军队等非敌对第三方部队,也不会为你的战团提供包围加成。
部分特长会影响包围效果:
- 背刺者会将包围提供的近战命中加成翻倍至 +10%。
- 以少敌多能抵消敌人的近战包围命中加成;但若遭到完全包围,敌人仍会获得总计 +5% 加成。如果攻击者拥有背刺者特长,以少敌多会抵消其额外效果,使其只获得普通包围加成。
举例来说,你的佣兵迪特黑尔姆、托斯蒂格和埃里克包围了一名强盗劫掠者。
轮到迪特黑尔姆行动时,他用手斧攻击这名强盗劫掠者,可获得 +10% 命中加成,即除第一名包围者外,每名相邻友军各提供 +5%。若迪特黑尔姆拥有背刺者,总加成就会达到 +20%。
接着轮到另一名佣兵贡特尔。他没有与目标相邻,而是用长柄斧攻击被包围的强盗劫掠者。他同样获得 +10% 命中加成;拥有背刺者时也同样翻倍。
最后,弓箭手伯恩哈德用猎弓攻击同一名强盗劫掠者。由于使用的是远程武器,他不会获得包围加成。
另一个情形如下图所示:
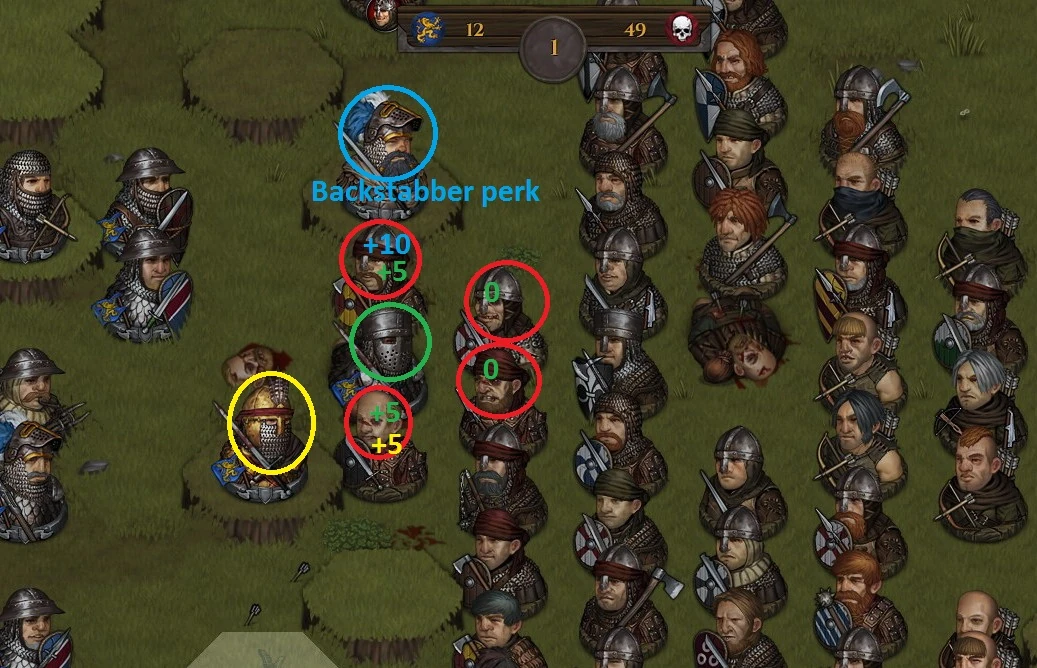 注意:双手斧的回旋斩等近战误伤,也会套用敌方对友军的包围修正,反而让你更容易打中自己人。面对拥有背刺者的行尸时,这尤其危险。以上图为例,蓝圈佣兵若使用穿透两格的攻击打击下方劫掠者,同时波及绿圈佣兵,那么误伤绿圈佣兵的概率甚至可能高于命中敌人的概率,因为周围劫掠者对绿圈佣兵形成的包围加成也会计入这次误伤。原文作者认为,这可能是开发者的疏漏。
特长
- 闪避会为近战防御和远程防御提供相当于当前先攻 15% 的加成。影响先攻的某些伤势,以及战斗中累积的疲劳,都会削弱闪避效果。重甲、重型武器(例如战斧)和盾牌造成的疲劳惩罚,也会降低先攻,使闪避收益减少。背包中带有疲劳惩罚的物品同样会影响先攻,不过物品放在背包中时,这一惩罚降低 50%。
- 盾牌精通能进一步提高盾牌提供的近战防御和远程防御,使当前装备盾牌的基础防御加成增加 25%。独特盾牌若具有更高的基础防御,就能从这一特长中获得更多收益。
- 某些武器精通会提高对应武器特定攻击的命中率。例如,使用巨剑或长刃战刀时,剑术精通会使劈开和挥击的命中率增加 +5%。
- 其他一些特长会在特定条件下增加或降低命中率,详见特长页面。
昼夜循环
《战场兄弟》的昼夜循环依次经过以下阶段:
- 黎明 - 早晨 - 正午 - 下午 - 傍晚 - 黄昏 - 夜晚
夜间作战时,战斗单位会受到夜间减益,承受 -2 视野、-30% 远程命中和 -30% 远程防御惩罚;免疫夜间效果的单位除外,例如装备獠牙乡头盔的角色。无论 AI 远程部队还是玩家佣兵,其远程命中通常明显高于远程防御,所以这些修正总体上往往更有利于防守方。因此,对抗远程火力占优的敌人时,夜间进攻通常更有利。
远程命中率
远程命中掷骰与近战基本相同:基础命中率等于佣兵的远程命中减去目标的基础远程防御。不过,除了通常的装备和特长因素,还需要考虑以下因素:
- 1. 距离以及该次攻击的基础命中加成
- 普通弓类使用速射时,每格距离承受 -4% 命中率惩罚,技能本身不提供基础命中加成。
- 普通弓类使用瞄准射击时,每格距离承受 -2% 命中率惩罚,同时获得 +10% 基础命中加成。
- 弩类使用弩矢射击时,每格距离承受 -3% 命中率惩罚,同时获得 +15% 基础命中加成;若使用刺桩重弩,基础命中加成只有 +10%。
- 计算弓的距离命中惩罚时,不计射手身旁的第一格,因此这一格不会带来惩罚。
- 例如:
(a.)一名远程命中为 50 的弓箭手,使用瞄准射击攻击 7 格外、远程防御为 0 的强盗暴徒,命中率为 50% + 10%(瞄准射击) - 12%(计入 6 格距离,每格降低 2) = 48%。
(b.)一名远程命中为 50 的弩手,使用轻弩的弩矢射击攻击 6 格外、远程防御为 0 的强盗暴徒,命中率为 50% + 15%(弩矢射击) - 15%(计入 5 格距离,每格降低 3) = 50%。 - 投掷武器,例如标枪束,每格距离承受 -10% 命中率惩罚,同时获得 +30% 基础命中加成。与弓和弩不同,投掷武器计算距离惩罚时,会计入攻击者身旁的第一格。
- 普通弓类使用速射时,每格距离承受 -4% 命中率惩罚,技能本身不提供基础命中加成。
- 2. 掩体会使总体命中率降低 75%;界面上显示为“射线受阻”,并配有盾牌和箭矢图标。鹰眼可将这一惩罚降低至 50%。以上面的例子(a.)为例,若强盗暴徒处于掩体后方,例如另一名敌人或你的佣兵挡在前方,弓箭手的命中率就只有 12%。学习鹰眼后可提高至 24%,因此它是远程佣兵的重要选择。
- 截至正式版 1.1,系统首先判断这一箭会射向预定目标,还是射向充当掩体的单位或障碍物;这次判定不会显示在战斗日志中。日志只显示随后针对实际目标的命中掷骰,不会再次计入掩体。[8]
- 远程攻击命中的任何目标都会受到压制特长带来的减益,即使该目标并非原本瞄准的对象,例如因散射而被击中的其他单位。即使攻击未命中原定目标,也能对原定目标施加压制。
- 与近战防御一样,闪避、盾牌和高低差都会影响远程防御。预判则根据攻击者的距离以及防守者的基础远程防御,提供额外远程防御;攻击者越远,预判提供的加成越高。某些敌人也拥有这些特长,例如地精伏击者就拥有预判。
- 3. 散射是指远程攻击未命中后,有概率击中目标相邻的其他单位,无论敌我。因此,即使命中预定目标的概率因射线受阻、远程命中较低或距离过远而不高,向密集敌群射击仍可能有效:你仍有不小的机会打中某个目标,希望那是敌人。
- 远程攻击发生散射时,甚至可能击中正常最大射程以外一格的非预定目标。
伤害
- 主条目: 伤害
技能命中目标时,无论是否原本瞄准该目标,都会造成伤害。伤害主要分为两类:
- 护甲伤害
- 生命值伤害
两类伤害分别掷骰计算。造成和承受的伤害取决于所用武器、技能、特长、特质及其他修正。护甲能够吸收并降低伤害。以下是计算护甲伤害与生命值伤害的简化公式:
armor damage = base damage * modifiers * effectiveness against armor %
1. HP damage = base damage * modifiers * ignoring armor damage % - armor * 0.1
2. if armor = 0 (destroyed), more damage is added (cannot be negative):
   + base damage * modifiers * (1 - ignoring armor damage %) - armor damage you already did
3. if critical hit, everything is multiplied by 1.5:
   HP damage = HP damage * 1.5
例如,用钩镰攻击一名穿着掠夺来的铁盔(300 护甲)和鳞甲(280 护甲)的兽人战士。武器基础伤害为 60-90,其中 30% 可以穿透护甲,造成 18-27 生命值伤害;破甲效率为 150%,因此可造成 90-135 护甲伤害。
- 兽人战士被击中头部,触发暴击,生命值伤害增加 +50%。
- 掷出了120点护甲伤害和27点生命值伤害
- 缴获的铁笠盔受到120点伤害,剩余180点护甲。
- 兽人战士承受的生命值伤害为:27 - 18(剩余护甲的 10%) = 9 * 1.5 = 13。
流血、瘴气等次生伤害通常会绕过护甲,造成固定数值的伤害;不屈等技能可以减轻这类伤害。
劈身
双手斧的劈身具有特殊机制。由于它在攻击命中时一定会打到头部,许多玩家误以为它必定造成暴击伤害。
实际上,劈身的暴击概率与普通攻击相同。如果触发暴击,第一段攻击就会命中头部并造成暴击伤害;否则,第二段攻击会命中头部,但护甲伤害和生命值伤害都减半。无论命中身体还是头部,第二段攻击始终只造成一半伤害,绝不会暴击,也无法从劈砍或蛮力特质等提高暴击伤害的效果中获益。
武器耐久
武器和盾牌的耐久度十分重要:耐久降为零时,装备就会损坏。
- 近战武器击中剩余耐久至少为 50 的护甲时,会损失 3 点耐久;若直接命中肉体、造成生命值伤害,则不会磨损。范围攻击会分别计算每次命中的耐久损耗。例如,战镰使用收割同时命中 3 个目标,且 3 次都击中护甲时,可能损失 9 点耐久。
- 盾牌被箭矢、弩矢或投掷武器命中,或受到劈盾技能攻击时,会损失耐久;劈盾伤害取决于所用武器。普通近战武器或野兽攻击若未命中角色、却击中盾牌,也会使盾牌损失耐久,每次 -1,与武器种类无关。
盾牌精通可将受到的盾牌伤害减半(50%),但最低仍为一点;斧术精通则使斧类劈盾技能的盾牌伤害增加 50%。 - 弓或弩每射击一次,耐久降低 2 点。
士气
- 完整说明见: 士气
士气分为六种状态,反映战斗单位的精神状况,并影响其战斗表现。“不可动摇”状态仅属于亡灵,无法改变。“镇定”是默认状态,非亡灵敌人开战时均处于这一状态;随后通过或未通过士气检定时,士气会升高或降低。佣兵的初始士气取决于其心情:心情好时,有概率以“斗志昂扬”状态参战;心情差则会降低其可达到的士气上限。某些特性也会影响初始士气或士气上限。
士气降至“溃逃”时,该单位会取消正在维持的盾墙、矛墙、还击架势和不屈,并立即移至行动顺序末尾。每轮开始时,溃逃单位在计算行动顺序时承受 -1000 先攻惩罚,因此除非受到肾上腺素影响,否则会最后行动。溃逃单位会尝试远离敌人,无法战斗或使用技能,即使被包围也不会还手;玩家也会失去对溃逃佣兵的控制。当身边没有相邻敌人时,溃逃单位可能自行恢复士气,也可通过重振士气等技能恢复。
各士气状态会对部分属性施加下表所示的倍率修正。这些修正在技能、特长和装备提供的加算加成之后计算,因此也会影响这些加成。部分士气状态会显示对应图标。
| 图标 | 状态 | 
|

|

|
|
|
|---|---|---|---|---|---|---|
| 永不动摇 | ||||||
 |
斗志昂扬 | 1.1 | 1.1 | 1.1 | 1.1 | |
| 镇定 | ||||||
 |
动摇 | 0.9 | 0.9 | 0.9 | 0.9 | 0.9 |
 |
濒临崩溃 | 0.8 | 0.8 | 0.8 | 0.8 | 0.8 |
 |
溃逃 | 0.7 | 0.7 | 0.7 | 0.7 | 0.7 |
参考资料
英文原文

Some weapons' parameters, skills, perks have not been updated since 'Blazing Deserts' (2020) and 'Of Flesh and Faith' (2022) DLCs.
Tactical turn based combat is the heart of Battle Brothers. The battlefield is a hex-tiled grid, with elevation, obstacles/terrain considerations and zone of control mechanics. An Action Point (AP) system limits the number of actions (movement, skill use) a unit can take each round and an initiative-based system determines the order in which combatants act out their turns.[1]
The character with the highest initiative will start first in a battle round, followed by characters with lower initiative. As initiative is lowered when a character builds up fatigue or has a penalty to max. fatigue (due to armor/weapons or other effects), his turn may move from first to last very quickly, if he gets fatigued too fast and the enemies do not.
Action Points (AP)
AP is spent by actions (moving, striking, using special skills/consumables, etc) and refreshed at the start of the every round. All brothers and most enemy units have 9AP. A few have less (ie Wiedergangers) and some have more (ie Direwolves, Goblin Wolfriders).
Movement on flat ground (Grass/Plains/Roads) costs 2AP. Rough terrain such as Forest/Snow have tiles that typically cost 3AP (there are tiles that still cost 2AP though (ie Light Snow)). Swamp costs 4AP for tiles with Murky Water. Changing elevation adds a further +1 to AP cost per tile. Most strikes from 1-handed weapons use 4AP (exception: Dagger (with Mastery) uses only 3AP) and strikes from 2-handed weapons use 6AP (exception: Warbrand, Rhomphaia and 2-Handed Cleavers use 4AP on regular strikes; Jagged Pike uses 5AP).
A typical battle starts with both parties in a line formation (1-2 lines deep for your forces, may be deeper for the enemy), with at least 5 hexes between parties. Human forces cannot close to melee distance within 1 round as traversing a hex takes a minimum of 2AP. Direwolves and Goblin Wolfriders on the other hand can definitely close the gap in 1 round. As bows have a range of 7 tiles on the flat (8 with mastery) and crossbows have a range of 6 tiles, both sides start the 1st round within firing distance of ranged combatants.
Fatigue疲劳
- For more information, see Fatigue (attribute)
Apart from AP, all weapon strikes and movement on the battlefield also cost fatigue to execute, therefore a fully fatigued character can neither strike nor move. Every character recovers 15 fatigue at the start of his turn. As per full release version 1.1, dodging/blocking blows also increases Fatigue by 2 and getting struck by a blow increases Fatigue by 5.
Zone of Control (ZoC)
Melee units - units with a melee weapon, bare fists, or beasts (except for alps and hexes) - exert a Zone of Control on tiles directly adjacent to them. Any unit trying to leave a tile under Zone of Control will suffer automatic strikes from the hostiles controlling the ZoC (at no fatigue cost for the controlling unit). If all strikes miss, the unit leaves the tile. If any strike hits, the attempt to leave the tile fails and the unit has to try again.
A unit using any kind of ranged weapon (i.e. bow, javelins), a fleeing or stunned unit does not exert a Zone of Control. A smoke pot removes the ZoC from affected tiles for 1 turn. Footwork skill allows to move through ZoC safely. Rotation skill allows a unit to leave the ZoC by swapping positions with another non-hostile unit. Entangled, horrified, and sleeping units lose their ability to exert their ZoC.
To-Hit Chance
- See also: Hit Chance
Base chance to hit (shown after selecting a skill and mousing over a target) is essentially: melee skill of brother subtracted against base melee defense of target. [2]
This is further modified by various factors listed below.
- Gear, elevation and surround bonuses are factored in additively. (ie an attacker with Melee Skill of 70 striking a defender with Melee Defense of 0 will have 70% hit chance. If said attacker had another friendly unit adjacent/surrounding the defender, he would get +5% or in other words his hit chance would be 75% instead)
- Morale bonuses/penalties and injury penalties are factored in multiplicatively (ie an archer with 86 Ranged Skill at Steady will have effectively 94 Ranged Skill at Confident (+10%))
Defense is improved by shields (mentioned below), various perks like Dodge, Shield Expert, Reach Advantage, etc. However, it is also subject to diminishing returns stat-wise at values beyond 50: each Melee Defense attribute point over 50 is halved.[3] [4]
When an attack is made, a regular d100 roll happens (a procedure to get a random number in the range of 1 to 100). If the number is lower than the to-hit % chance, then this is a hit. At this point, a second d100 roll is made to see if it the attack hits the head. [5]
Gear
- Weapons with hit bonuses include, for example, pitchforks, pikes and the Battle Standard战旗 with a +10% chance when using the "Impale穿刺" skill.
- Weapon skills like Slash挥斩 (+10% hit chance, available for swords) or Thrust挺刺 (+20% hit chance, available for spears)
- Shields confer strong defense bonuses which significantly lower the hit chance of anyone attacking someone who has a shield equipped. Examples of standard shields:
| Buckler 小圆盾 | Wooden Shield 木盾 | Adarga Shield 阿达尔加盾 | Kite Shield 鸢形盾 | Sipar Shield 西帕尔圆盾 | Heater Shield 熨斗形盾 |
|---|---|---|---|---|---|
|
|
|
|
|
|
|
| +10 + 5
|
+15 +15
|
+15 +20
|
+15 +25
|
+18 +18
|
+20 +15
|
The Shieldwall盾墙 skill (not available to mercenaries using a Buckler小圆盾 as it is not a "normal" shield) can be used in combat to double shield defense (inclusive of Shield Expert bonus) with a additional +5 bonus for each adjacent ally also using the Shieldwall盾墙 skill. This tactic can be used to give your front rank mercenaries a big boost to defense when taking a large amount of damage is otherwise inevitable (e.g. needing to advance while under fire from enemy ranged troops).
The Knock Back击退 skill knocks the target away by 1 tile, costs 4AP, 20 Fatigue, and has a flat +25 to hit bonus. Terrain and surround bonuses apply as usual. However unlike regular strikes, Knock Back does no direct damage and its roll is not displayed in the combat log. If the game will allow you to use an ability against an enemy that is immune, it will then simply miss. This is relevant because one might assume that a pike's repel ability which both knockbacks and staggers would still apply the stagger effect to an immune enemy, it does not.
Height Level
Height levels are used as ground elevations (hills) on the battle map. When standing on them, you gain a bonus to hit chance while enemies suffer a penalty to their chance to hit you.
Changing height level costs more action points and costs more fatigue than walking on the same height layer. The Pathfinder寻路者 perk eliminates the action point penalty. The Pathfinder寻路者 perk is especially useful for polearm or 2H weapon users, as it allows them to change height level and still attack. It is also extremely useful for ranged mercenaries as they gain significant bonuses from having a higher elevation than their targets and the Pathfinder寻路者 perk facilitates easy repositioning.
There are the following types of height level in-game:
- Flat Ground (0 Height Level)
- 1. Height Level
- 2. Height Level
- 3. Height Level
When standing on a higher height level than your opponent, you gain a +10% chance to hit and they suffer a -10% penalty to hit. It is always advantageous to have the high ground in any battle and the AI will try to occupy the high ground whenever possible, especially their ranged units.
Ranged weapons gain an additional hex of range for each level of height and improved hit chance versus targets at a lower height level.
You only count as being in melee attack range if there is a one level difference of height between opposing characters standing in adjacent hexes. If there are two or more levels of height difference between the hex a character is standing on and an enemy in an adjacent hex, you do not count as being in melee attack range or being in each other's Zone of Control.
Surrounding
Surrounding occurs when two or more units are adjacent to another one they fight against. For each unit after the first surrounding, a bonus of +5% melee hit chance is given to allies attacking the surrounded target. Both allies and enemies are affected by surrounding.[6] Stunned眩晕 brothers or brothers with Ranged Weapons will not contribute to surround bonus.[7] Non-hostile parties, be it Peasants, Mercenaries, Noble House Forces or alike, don't provide surround bonus for your party.
Some 一些Perks特长 can affect surrounding:
- Backstabber背刺者 doubles the surrounding bonus to melee hit chance to +10%.
- Underdog以少敌多 negates the surrounding bonus to melee hit chance unless completely surrounded - in that case, the bonus is +5% in total. If an attacker has the Backstabber perk, its effect is negated and the normal surrounding bonus is applied instead.
Let's study a case. A Raider is surrounded by your mercenaries Diethelm, Tostig and Erik.
It is Diethelm's turn. Attacking the Raider with his Handaxe手斧, Diethelm benefits from a bonus of +10% hit chance. That is +5% for each ally adjacent to the target after the first. With Backstabber背刺者, Diethelm would have benefited from a total bonus of +20% hit chance.
It is now the turn of Gunther, another of your mercenary. Gunther is not adjacent to the surrounded Raider and attacks him with a Longaxe长柄斧. He will also benefit from a bonus of +10% hit chance, doubled with Backstabber背刺者 for the same reasons.
Finally, your archer Bernhard acts. He attacks the same Raider with a Hunting Bow猎弓. Bernhard will not benefit from any bonus because he is using a Ranged Weapon.
Another case in picture:
NOTE: In case of friendly melee fire such as the two handed axe round swing, the enemy surround modifier works AGAINST you, which is particularly devastating against Weidergangers as they have backstabber. Meaning in the example above if the blue circled brother was to use his two tile pierce attack against the raider below, and thereby also target the brother circled in green. The chance to hit the green brother with friendly fire would likely be higher than that of hitting the enemy bandit, as the surround multiplier of nearby raiders would apply to the friendly fire attack. This is likely an oversight by the devs.Perks特长
- Dodge闪避 gives a bonus equal to 15% of current Initiative to both Melee Defense and Ranged Defense. Note that Dodge loses effectiveness due to certain injuries which affect Initiative and as a mercenary builds up fatigue during battle (accumulated fatigue lowers Initiative). Dodge is also less effective on characters that are wearing heavier types of armor and using heavy weapons (e.g. Fighting Axe) and even shields as your Initiative is lowered based on the fatigue penalty of equipped weapons, shields, armor and by what is being carried in your bags if it has a fatigue penalty (although this penalty is reduced by 50% while said items are in your bags).
- Shield bonuses to Melee Defense and Ranged Defense can be increased further by using the Shield Expert盾牌精通 perk which increases the base defense bonuses of the currently equipped shield by 25%. Unique shields with higher bonuses to defense values make this perk even more potent.
- Some weapon masteries increase the to-hit chance of particular attacks of the related weapon (e.g. Sword Mastery剑术精通 gives the Split劈开 and Swing挥击 attacks available when using a Greatsword巨剑 or Warbrand长刃战刀 a +5% chance to hit).
- Some other perks give bonuses/maluses to hit chances under specific conditions. They are described in more detail on the Perks特长 page.
Day/Night Cycle
Battle Brothers uses a day/night cycle, going through the following phases
- Dawn - Morning - Midday - Afternoon - Evening - Dusk - Night
Battles fought during the night give combatants the Nighttime夜间 debuff which gives them penalties of -2 Vision, -30% Ranged Skill and -30% Ranged Defense (if not immune to the effects - e.g. having The Fangshire獠牙乡 helmet equipped). As Ranged Skill for both AI ranged troops and human-controlled mercenaries generally tends to be significantly higher than Ranged Defense in most cases, this usually works out in favor of the defender. Thus it is advantageous to attack enemies which have ranged superiority during Nighttime.
Ranged To-Hit Chance
Ranged to-hit rolls operate in the same manner as melee to-hit rolls, where to-hit = Ranged Skill of brother subtracted by base Ranged Defense of target. A few additional factors come into play though, besides the usual gear and perk considerations, namely:
- 1. Distance and base accuracy bonus of strike
- Regular bows suffer -4% accuracy per hex with Quickshot (no base accuracy bonus)
- Regular bows suffer -2% accuracy per hex with Aimed Shot瞄准射击 (offset by a +10% base accuracy bonus)
- Crossbows suffer -3% accuracy per hex when using the Shoot Bolt弩矢射击 skill (offset by +15% base accuracy bonus for the Shoot Bolt skill (only +10% base accuracy bonus if using a Spiked Impaler刺桩重弩))
- The first hex from the bowman is NOT counted and does not give penalties for the purposes of to-hit chance calculations.
- Examples:
(a.) Aimed Shot瞄准射击 by a Ranged Skill 50 bowman on a Bandit Thug with a Ranged Defense skill of 0 who is 7 hexes away, will have 50% + 10% (Aimed Shot) - 12% (accuracy degradation of 2 for 6 hexes of distance) = 48% to-hit chance.
(b.) Shoot Bolt弩矢射击 by a Ranged Skill 50 crossbowman on a Bandit Thug with a Ranged Defense skill of 0 who is 6 hexes away using a Light Crossbow轻弩, will have 50% + 15% chance for Shoot Bolt弩矢射击 - 15% (accuracy degradation of 3 for 5 hexes of distance) = 50% to-hit chance. - Thrown weapons (e.g. Bundle of Javelins标枪束) suffer a penalty of -10% accuracy per hex (offset by a +30% base accuracy bonus). Note that, unlike bows and crossbows, thrown weapons DO count the first hex from the attacker for distance effects on accuracy.
- Regular bows suffer -4% accuracy per hex with Quickshot (no base accuracy bonus)
- 2. Cover庇护 (shown as "Line of fire blocked" with it's own unique icon of a shield with an arrow) reduces overall to-hit chance by 75%. This penalty can be reduced to 50% by the Bullseye鹰眼 perk. In the above example (a.), the bowman would only have a 12% to-hit chance on the Bandit Thug if he had cover (e.g he was standing behind another enemy unit or was behind one of your own units. This chance would be improved to 24% with the Bullseye鹰眼 perk making it a core pick for ranged mercenaries.
- The initial roll on whether the shot hits the intended target or its 'Cover' (which could be another unit or an inanimate obstacle) is NOT shown on the battle log though as of release 1.1. The battle log ONLY displays the to-hit roll for the intended or unintended target, without factoring in Cover a second time.[8]
- Ranged attacks confer the debuff granted by the Overwhelm压制 perk to any target struck even if it is not the intended target (e.g. hit on another target due to the scatter mechanic for ranged attacks) or even by a miss on the intended target.
- As with Melee Defense, the Dodge闪避 perk and shields also affect Ranged Defense, as does height advantage/disadvantage. The Anticipation预判 perk confers a bonus to Ranged Defense based on the distance from the attacker and on the base Ranged Defense of the defender. The farther the distance from the attacker, the bigger of a bonus Anticipation预判 provides to Ranged Defense. Some enemy units have access to these perks as well (e.g. Goblin Ambushers地精伏击手 have the Anticipation预判 perk).
- 3. Scatter is a mechanic whereby a missed ranged attack has a chance to strike an adjacent target, friendly or enemy. Because of scatter, it can be effective to fire into a block of enemy units even if your hit chance on your intended target is low for whatever reason (e.g. due to the line of fire being blocked, due to low ranged skill or due to distance). In this circumstance, you have a reasonable chance to hit something (hopefully an enemy!).
- Ranged attacks via the scatter mechanic can actually strike unintended targets one hex beyond the normal maximum range of the attack in question.
Damage伤害
- Main article: Damage伤害
When the target of a skill is hit (intentionally or not) it will receive damage. There are two main types of damage:
- Armor damage
- Hitpoints damage
Each type is rolled separately. Damage dealt and received depends on several factors including the weapon and skill used as well as perks, traits and other modifiers. Armor absorbs and reduces damage taken. This is a simplified formula for calculating armor and hitpoints damage:
armor damage = base damage * modifiers * effectiveness against armor %
1. HP damage = base damage * modifiers * ignoring armor damage % - armor * 0.1
2. if armor = 0 (destroyed), more damage is added (cannot be negative):
   + base damage * modifiers * (1 - ignoring armor damage %) - armor damage you already did
3. if critical hit, everything is multiplied by 1.5:
   HP damage = HP damage * 1.5
For example, using a Billhook钩镰 to attack an Orc Warrior兽人战士 wearing a Looted Kettle Hat (300) and a Looted Scale Armor (280). The weapon base damage is 60-90, 30% of it ignores armor for 18-27 hp damage and it has 150% effectiveness against armor for 90-135 armor damage
- Orc Warrior is hit in the head (critical hit), resulting in +50% HP damage
- 120 is rolled on armor damage, 27 on hp damage
- Looted Kettle Hat takes 120 damage. 180 armor remains.
- Orc Warrior takes 27 - 18 (10% of remaining armor) = 9 * 1.5 = 13 damage to hitpoints
Secondary damage (bleeding, miasma, etc.) usually bypasses armor and deals a constant amount of damage which can be mitigated with skills like Indomitable.
Split Man劈身
Two-Handed Axes' Split Man劈身 skill has specific mechanics. The fact that it hits the head on a successful attack has mislead many players into thinking that it always does critical damage.
In fact, Split Man has a standard chance to land a critical hit. If it does, the first strike will hit the head and deal critical damage. If not, the second strike will hit the head for half damage (armor and hitpoints). The second strike always deals half damage whether it hits the body or the head. The second strike can never be a critical hit, do critical damage or benefit from skills that increase critical damage like Chop劈砍 or Brute trait.
Weapon Durability
Weapon durability is important, as when a weapon's or shield's durability reaches zero, the weapon or shield will break.
- Melee weapon durability is lowered by 3 when it strikes armor that has at least 50 durability remaining; weapons are never damaged when they hit flesh (Hitpoints). Durability loss for AoE strikes is calculated separately for each individual hit (ie a Warscythe can lose 9 durability on using Reap, if 3 targets are successfully struck and all 3 hits connect with armor).
- Shield durability is lowered if it is hit by Ranged weapon projectile (bolt/arrow, throwing weapon), by being hit with the Split Shield skill of a weapon (the shield damage will vary based on the weapon doing the splitting) or by randomly being hit with any melee weapon or beast attack when the attempted attack fails but doesn't miss and hits the shield instead (-1 durability for each hit, regardless of weapon).
The Shield Expert盾牌精通 Perk reduces the incoming shield damage by half (50%) to a minimum of one, while the Axe Mastery斧术精通 increases axes' Split Shield damage to shields by 50%. - Bow or Crossbow弩 durability is lowered by 2 with each shot.
Morale士气
- See full article: Morale士气
Morale has six states and represents the mental condition of combatants and their effectiveness in battle. Unbreakable state is exclusive to Undead亡灵, and can not be changed. Steady is the default state, and non-undead enemies start with it and it can raise and lower as they pass or fail morale checks. Brothers' morale depends on their mood: good mood gives a chance to start with Confident morale, and bad mood lowers the maximum possible level of morale the brother can have. Some traits also affect starting morale or its maximum.
If morale drops to Fleeing, the unit cancels its active Shieldwall盾墙, Spearwall矛墙, Riposte还击架势 and Indomitable不屈, is also instantly moved to the end of turn order. At the start of a round Fleeing units have a penalty of -1000 initiative for turn order only, so they will act last, if not under Adrenaline肾上腺素. Fleeing units try to run away from enemies and can't fight or use skills, and even don't fight if surrounded. Player loses control over fleeing brothers. Fleeing units can rally on their own when not adjacent to enemies, or if targeted by skills like Rally the Troops重振士气 that restore their morale.
Morale states apply multipliers to some attributes as shown below. They count after additive bonuses from skills, perks and equipment, affecting them as well. Some states are indicated by icons.
| Icon | State |
|
|
|
|
|
|---|---|---|---|---|---|---|
| Unbreakable永不动摇 | ||||||
|
Confident | 1.1 | 1.1 | 1.1 | 1.1 | |
| Steady | ||||||
|
Wavering | 0.9 | 0.9 | 0.9 | 0.9 | 0.9 |
|
Breaking | 0.8 | 0.8 | 0.8 | 0.8 | 0.8 |
|
Fleeing溃逃 | 0.7 | 0.7 | 0.7 | 0.7 | 0.7 |